Embedding CalendarAnything into a Custom Lightning App Page
If your business has requirements that go beyond our out-of-the-box features, reach out - we offer custom development services for CalendarAnything to meet your unique needs.
This article shows you how a system administrator can create a custom Lightning app page embedded with CA LWC.
In this article:
- Before you begin
- Create a custom Lightning app page
- Customize calendar component properties
- Control access to the calendar
- Activate the page and add to menu
Before you begin
Read this section to familiarize yourself with what you need to build a custom Lightning app page.
Lightning app page template
A Lightning app page template provides a layout for building a new custom Lightning app page. The template contains regions into which you can drag-and-drop components. Regions with no components will not appear when users launch the page.
You must have access to a suitable template to create a new custom Lightning app page. If you need to create a template, refer to the Salesforce document entitled Create a Custom Lightning Page Template Component.
Lightning App Builder
The Salesforce Lightning App Builder enables you to create a custom Lightning app page. Lightning App Builder is comprised of three sections:
- The left-side panel that contains standard and custom components.
- The larger center area that contains regions into which you can drag-and-drop components. The regions are determined by the selected Lightning app page template.
Note: You can see a list of existing templates in step 5 of Create a custom Lightning app page. - The right-side panel that contains either page or component properties. If a component is selected, the panel contains the properties for that component.
Throughout this article, examples show you how to perform certain tasks. Field list selections and data entry values in the examples don't necessarily exist in your organization.
Create a custom Lightning app page
To learn how to create a custom Lightning app page with two components, follow these steps:
- Go to Salesforce Settings. In the Quick Find box, enter Lightning App Builder. A list of existing Lightning pages appears.
- Click the New button located directly above the list. A popup appears for you to select a page type.
- Select App Page and click Next. A popup appears for you to enter a label.
- Enter a Label for the new page and click Next. A popup appears with a list of app page templates.
- Scroll the left panel to find the template you need. For this exercise, select the standard template labeled Main Region and Right Sidebar.
- Click Done. The Lightning App Builder appears.
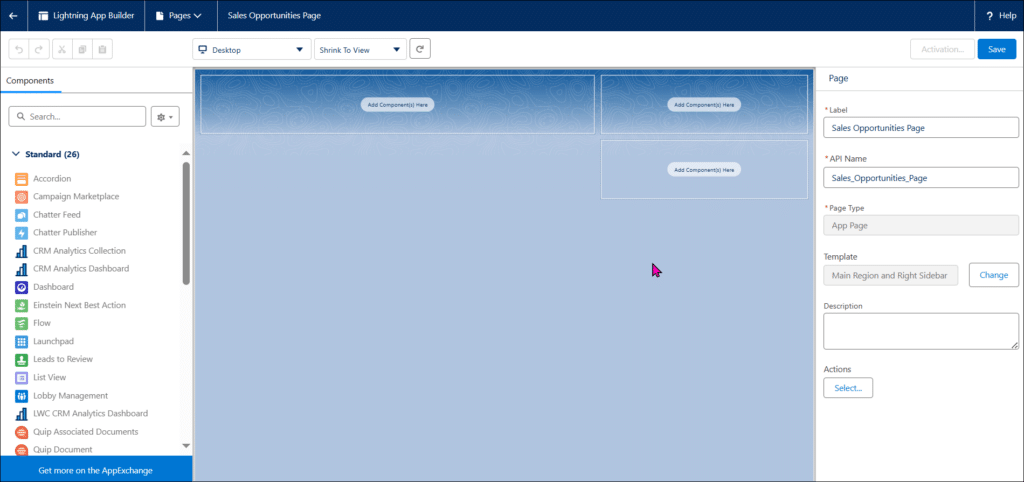
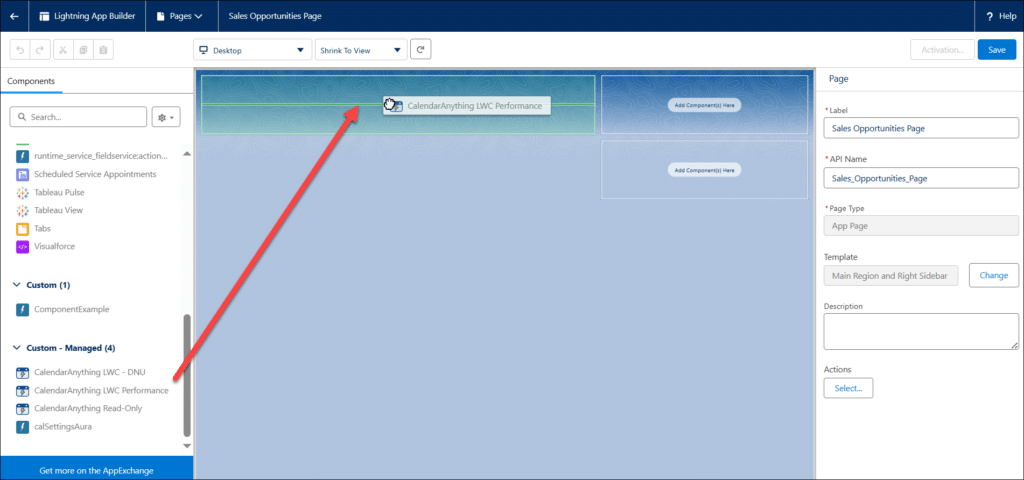
- Scroll to find the CalendarAnything LWC Performance custom component. Drag-and-drop the component onto the first region. After you drop a calendar component onto a region, its properties appear in the right panel. You can change component properties later.
Note: If a calendar component is hidden from the user, the region in which it would appear takes up space on the page despite the calendar not being displayed.
- Scroll the component panel on the left of the page to find the Recent Items standard component. Drag-and-drop the component onto the top sidebar region.
- Configure the Recent Items component properties as follows:
- Select a Label.
- Click Select. A popup with a panel of Available objects and a panel of Selected objects appears.
- On the popup:
- Remove the default object from the Selected panel.
- Select Opportunity from the Available panel and move it to the Selected panel. Note: The intent for this example is to show recent Opportunities from the Opportunity object.
- Click OK. The popup closes.
- Optionally change the default value in Number of Records to Display.
- Click Save. A popup indicates that the page is saved and that you can Activate it now or later.
- Click Not Yet. You will activate the page later; however, keep the page displayed in Lightning App Builder.
Customize calendar component properties
 When a component is selected in Lightning App Builder, its properties appear in the right panel. Some properties may contain defaults. You can customize the properties when first building the page or later. To see definitions of the calendar component properties, refer to CalendarAnything LWC Embedding for calendar component property definitions.
Example: Set default calendar on page launch
For this exercise, set the property that determines the default calendar for the Lightning app page by following these steps:
- With the new page still displayed in Lightning App Builder, click the calendar component. The right panel shows the calendar component properties.
- Enter the calendar API Name or calendar ID in the field labeled Calendars to Enable at Startup.
- Click Save.
Control access to the calendar
The Lightning App Builder enables you to limit access to components placed on the page. For example, you can limit calendar access to users with a specific profile but allow all users to see the other components on the page.
Note: If a calendar component is hidden from the user, the region in which it would appear takes up space on the page despite the calendar not being displayed.
For this exercise, you will make the calendar component available to all Sales personnel and to the system administrator. To do this, follow these steps:
- Click + Add Filter under Set Component Visibility. A small context popup appears.
- Click Select. The Select Field popup appears.
- Click the field arrow. A dropdown of field categories appears.
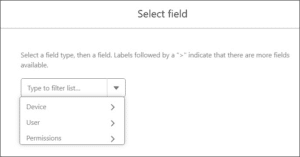
- Select User. A User dropdown field appears.
- Click the field dropdown arrow. A scrollable field list appears.
- Select Profile. Details about the selected field appear on the popup.
- Select Name.
- Click Done.
- Click the Operator field. The dropdown field list appears.
- Select Equal.
- Enter System Administrator in the Value field.
- Next, add an additional filter to grant access to all users with a Sales profile.
- Click + Add Filter.
- Select User.
- Select Profile.
- Select Name.
- Click Done.
- Click the Operator field.
- Select Contains.
- Enter Sales in the Value field.
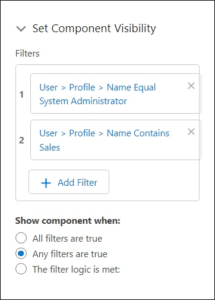
- Under Show component when, select Any filters are true to ensure that the user’s profile can be either System Administrator or one of the Sales Department profiles.
- Click Save.
This image shows the Set Component Visibility configuration results.
Activate the page and add to menu
Follow these steps to activate the page:
-
Click Activation. The Activation popup appears. The popup has three tabs. Page Settings is selected by default.
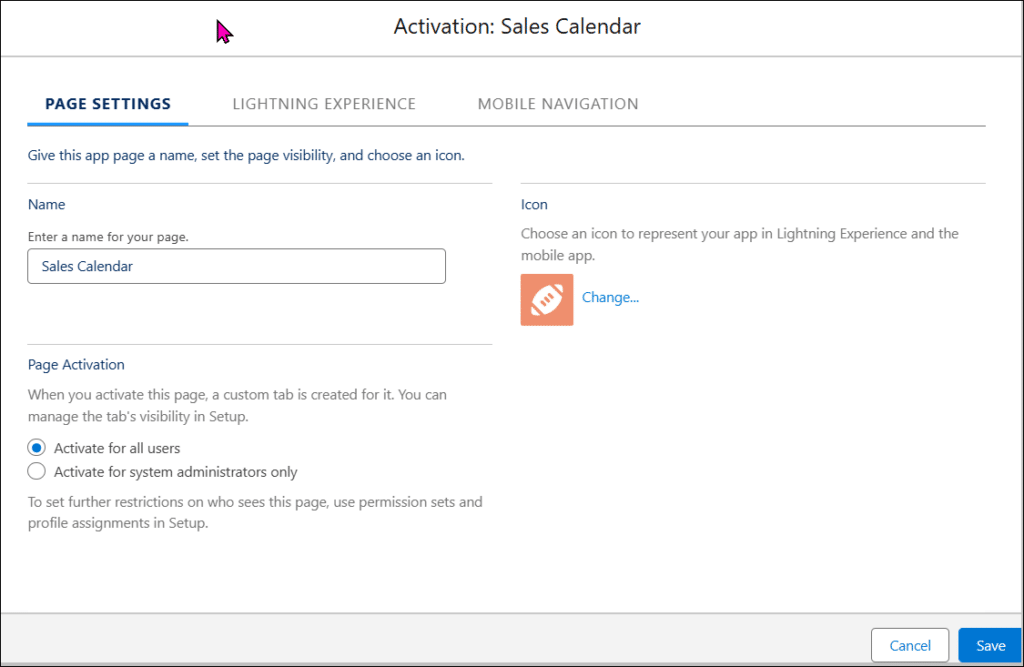
- On the Page Settings tab:
- Change the page name or leave the one you had selected earlier.
- Optionally, change the default icon.
- Under Page Activation, you can leave the default option Activate for all users or you can select Activate for system administrators only.
- To add the new page to an app menu, select the Lightning Experience tab. On the Lightning Experience tab:
- Select an app from the list.
- Click Add page to app.
- Click Save. The Activation popup closes.
-
Click Save on the Lightning App Builder.
To add the new page to your CalendarAnything menu, use standard menu maintenance functionality. To add additional access control, use permissions sets and profile assignments.