Setting Up a CalendarAnything Microsoft Integration – Admin Guide
If your business has requirements that go beyond our out-of-the-box features, reach out - we offer custom development services for CalendarAnything to meet your unique needs.
This article explains how to set up a Microsoft integration with CalendarAnything LWC.
In this article:
- Ensure Prerequisites are Met
- Add Remote Sites
- Log into the Integration and Request Permissions
- Grant Admin Consent in Microsoft Entra Admin Center
- Set Force Consent Form to False
Ensure Prerequisites are Met
- The calendar’s primary data object must contain a Long Text Area field that will be used to store meeting information. This field can be an existing Long Text Area field or a custom field created for this purpose. If such a field is not available, one must be created.
- If the Microsoft Entra Admin Center already has CalendarAnything listed, the listing must be deleted. Follow these steps to see whether one is listed and, if so, how to delete it.
- Log into the Microsoft Entra admin center (requires a Microsoft Business account).
- Select Enterprise Apps.
- Select All applications.
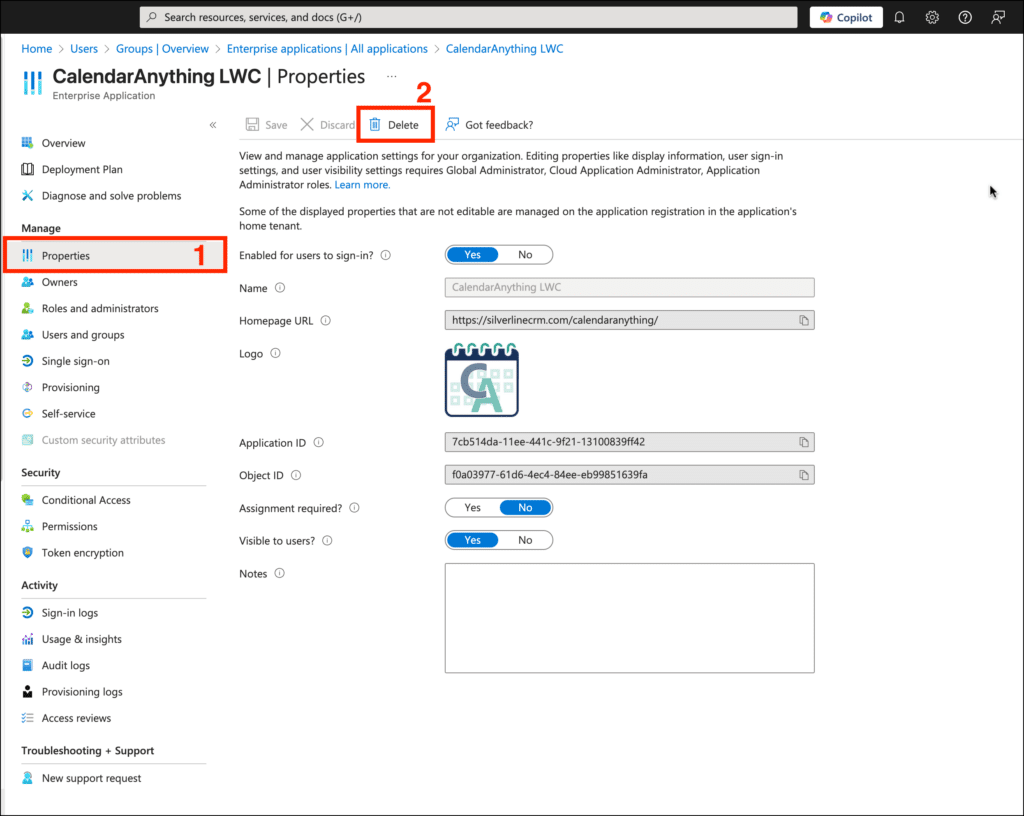
- If there is a CalendarAnything link listed, click it.
- Select Properties.
- Click Delete. A confirmation popup appears.
- On the Delete CalendarAnything? popup, click Yes.
- On the All Applications page, click Refresh.
- If for some reason CalendarAnything is still not deleted, select Properties and click Delete again.
Add Remote Sites
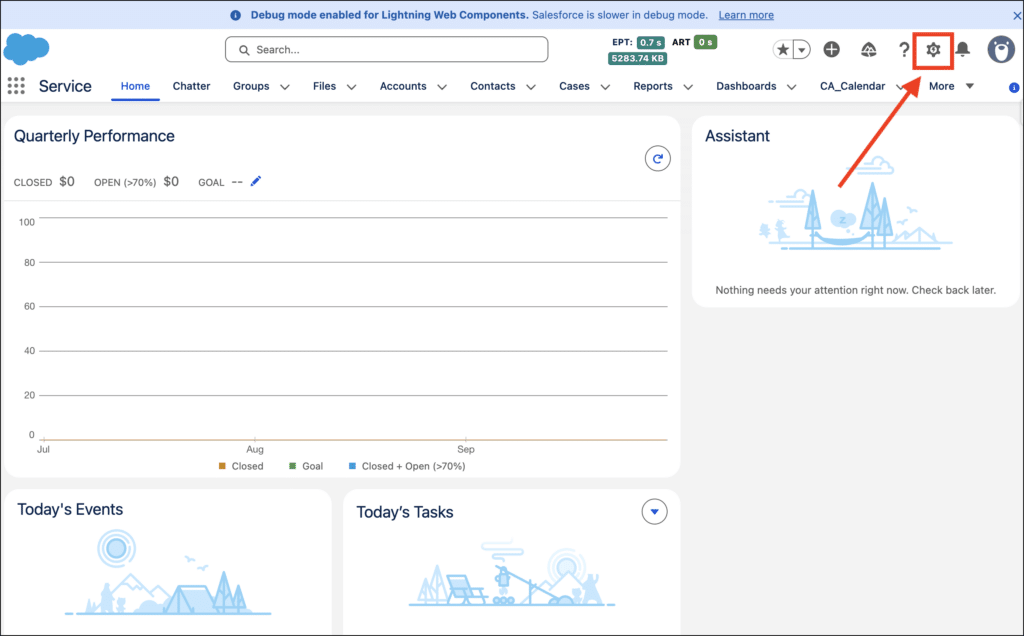
- Log into Salesforce.
- Click the Salesforce gear icon to go to Setup.
- Go to Security > Remote Site Settings.
- Click New Remote Site.
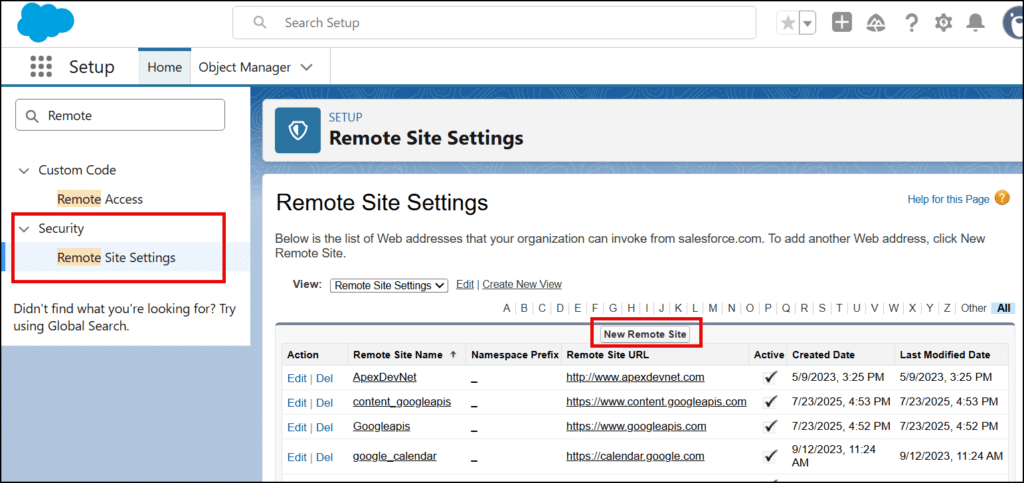
- Use the Remote Site Edit page to add two remote sites.
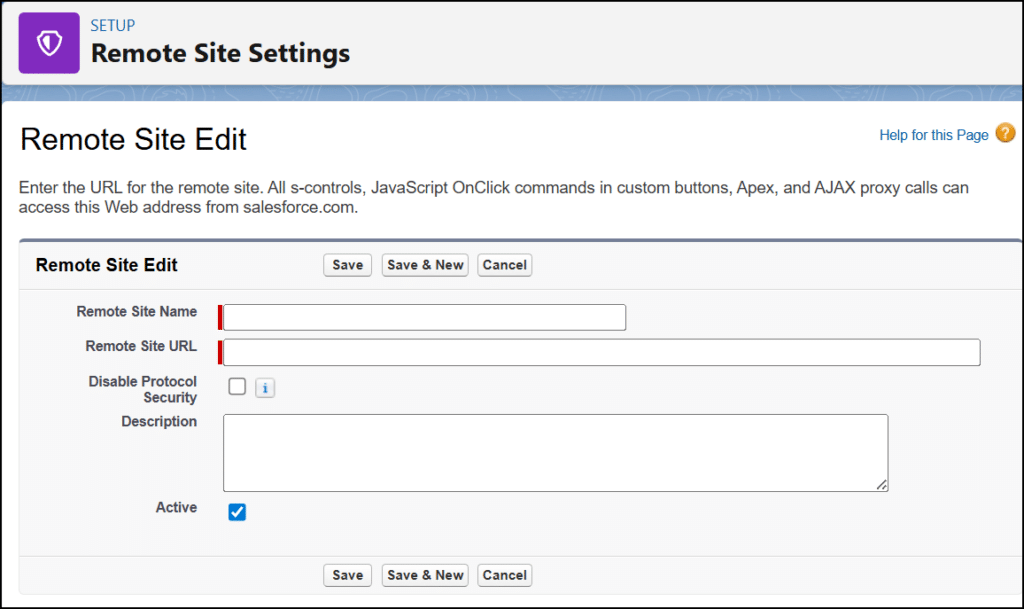
- Add Microsoft remote site as follows:
- Remote Site Name: Microsoft
- Remote Site URL: https://graph.microsoft.com
- Click Save & New. The application saves the data and displays the blank edit page again.
- Add Microsoft Online remote site:
- Remote Site Name: Microsoft Online
- Remote Site URL: https://login.microsoftonline.com
- Click Save.
- Add Microsoft remote site as follows:
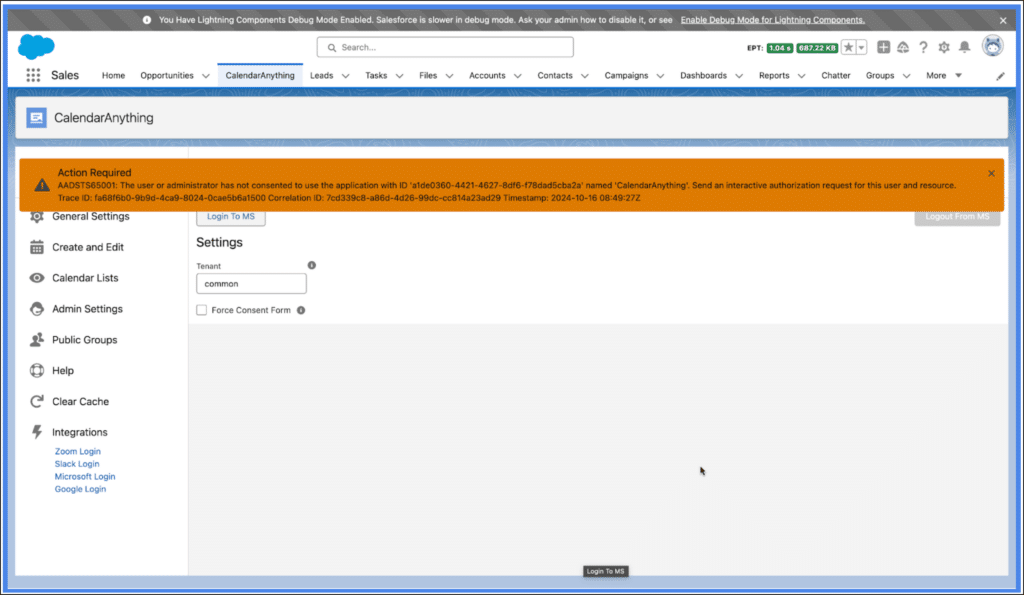
Log into the Integration and Request Permissions
- Access CalendarAnything.
- Go to Settings > Integrations > Microsoft Login.
- Set Force Consent Form to FALSE (checkbox should be blank).
- Click Login To MS and log in with Microsoft Admin credentials.
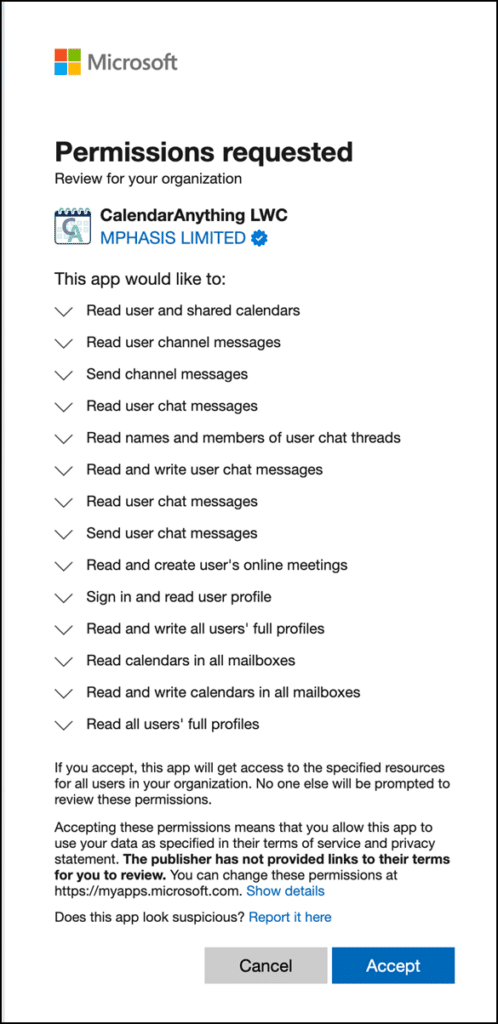
- In Permissions requested, set consent checkbox to TRUE, and click Accept.
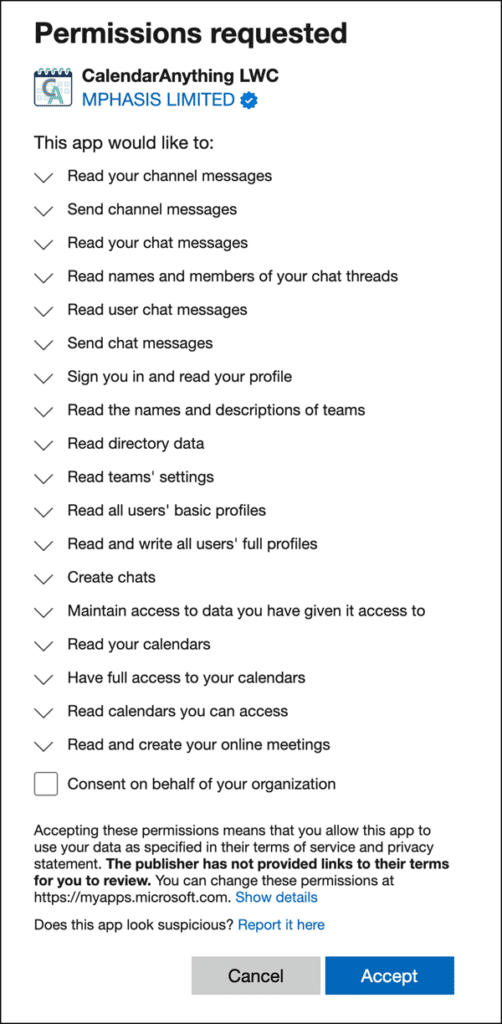
- Close out the Action Required message.
Grant Admin Consent in Microsoft Entra Admin Center
- Return to the Microsoft Entra admin center:
- Select Enterprise apps.
- Select All applications.
- If CalendarAnything is not listed in All Applications, click Refresh.
- Click CalendarAnything.
- Select Permissions.
- Click Grant admin consent for … button (#2 on image below).
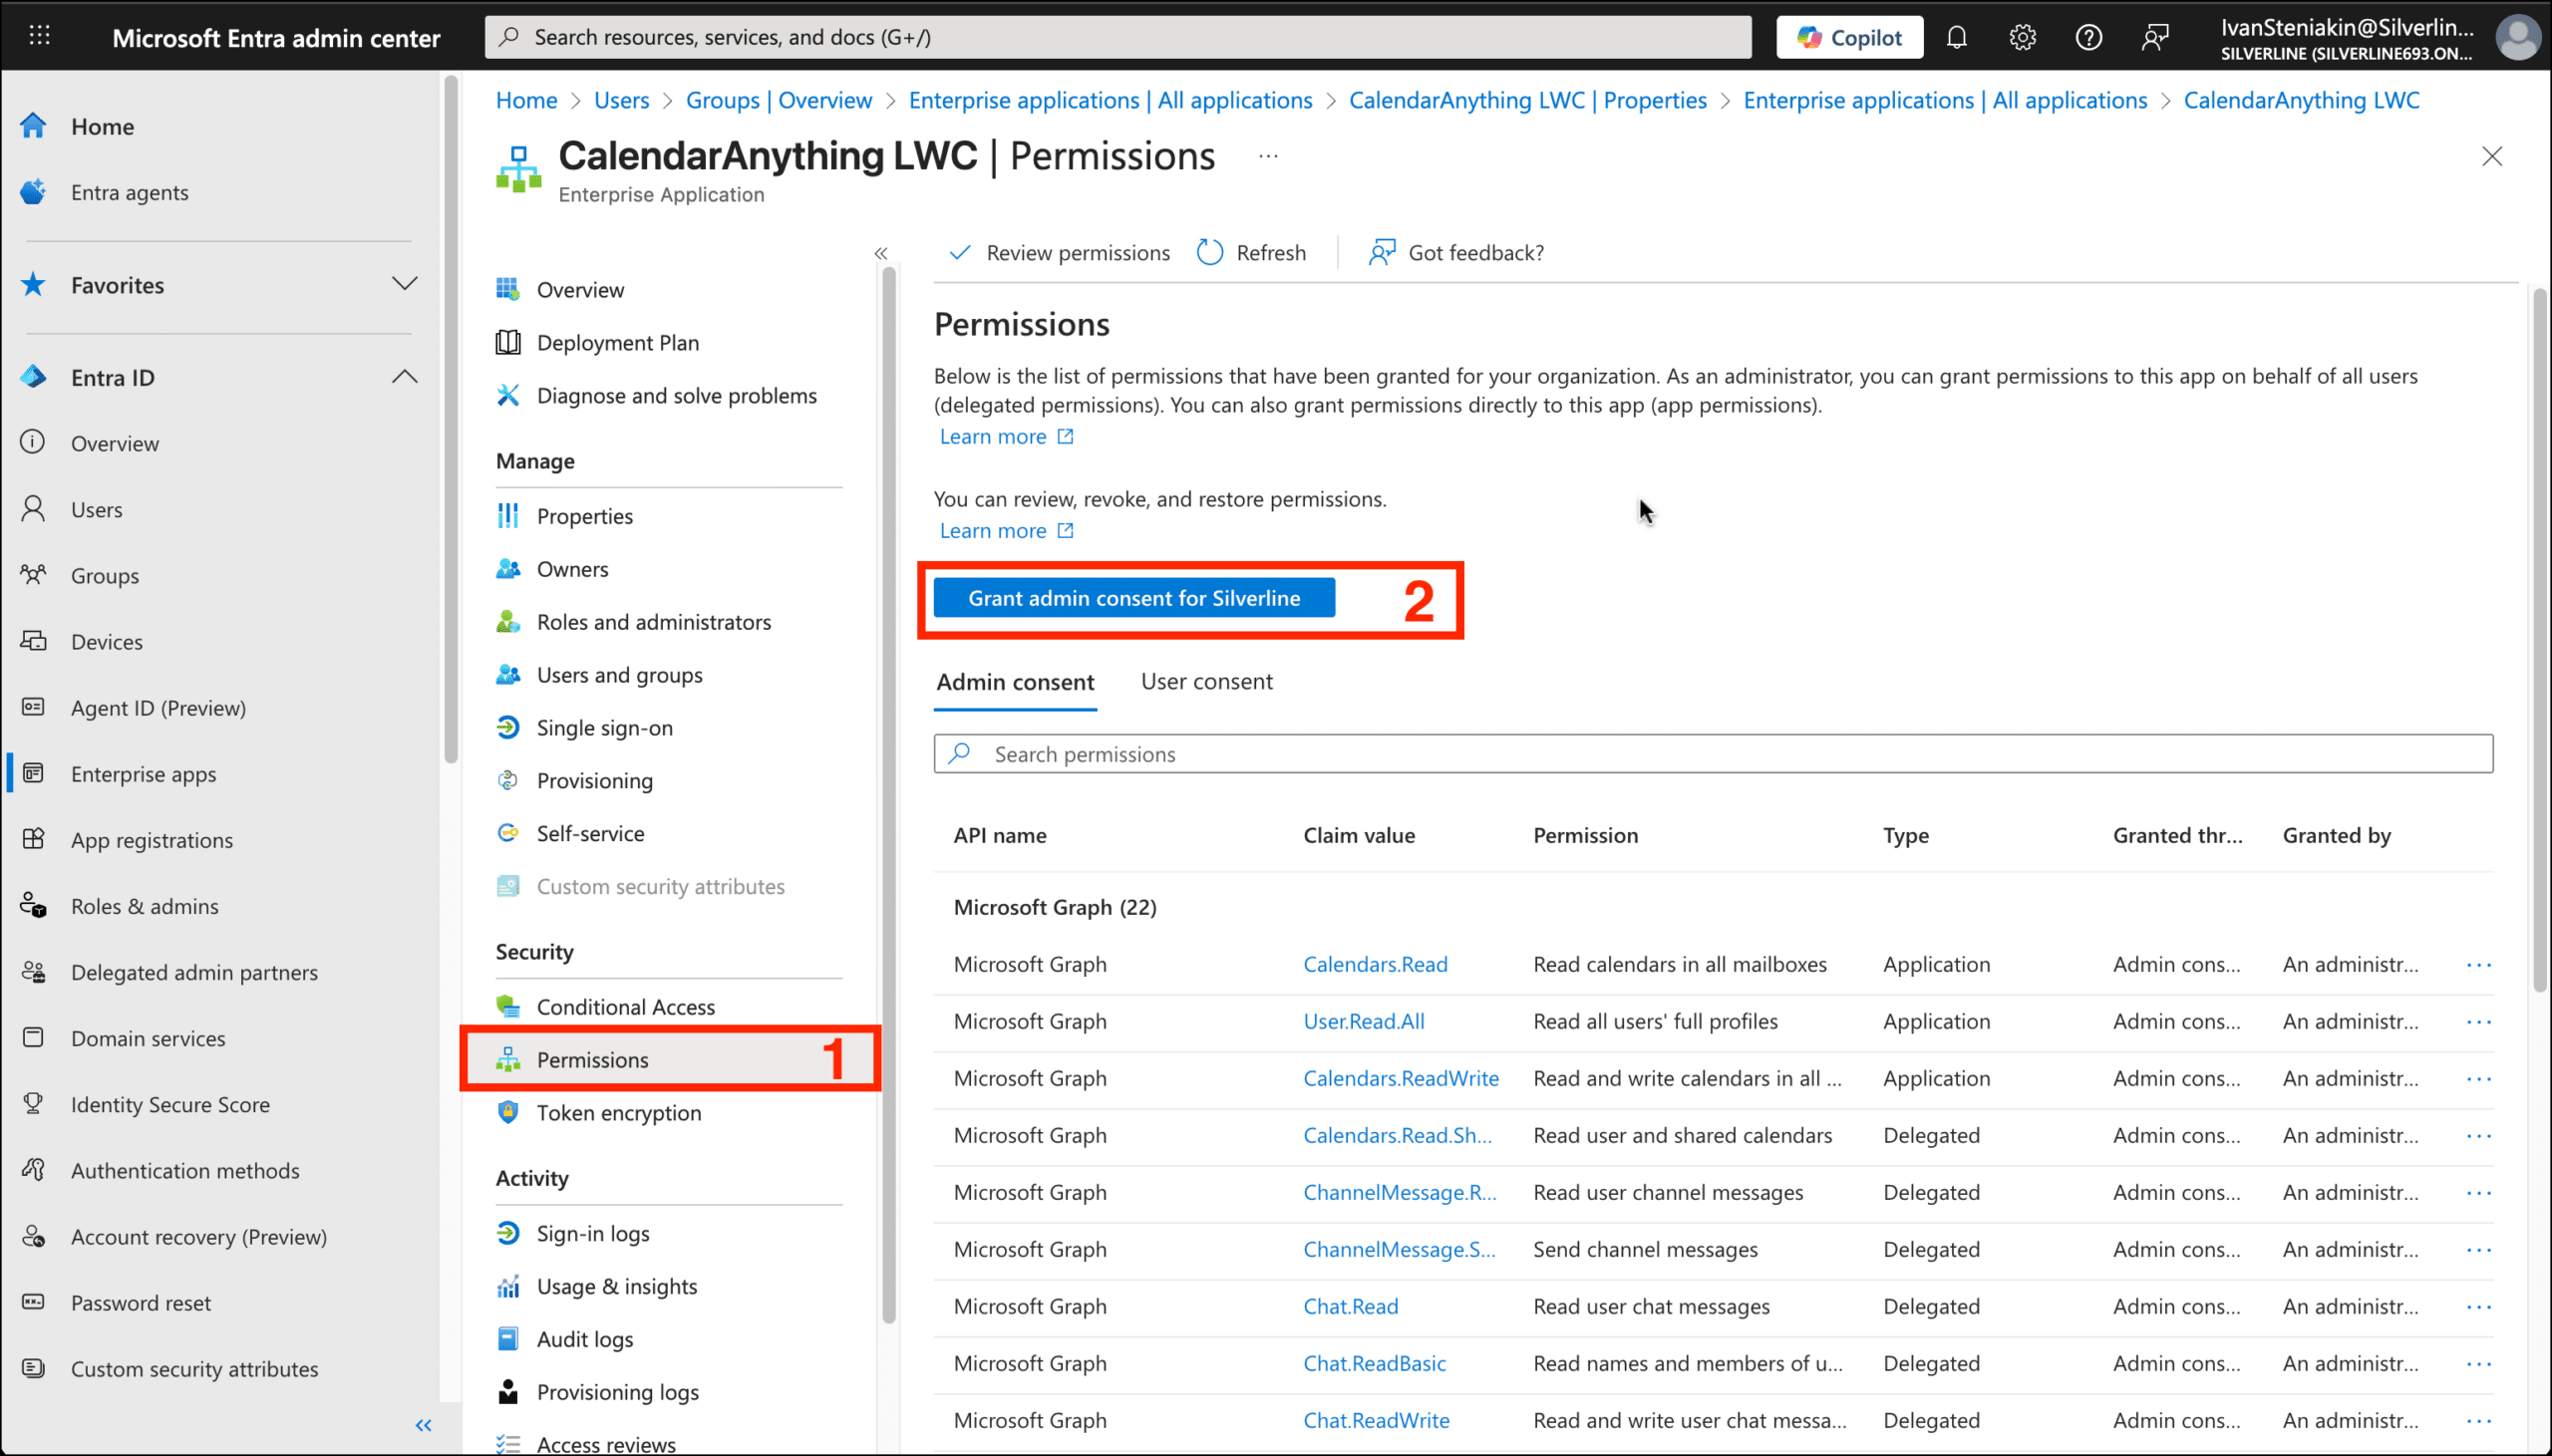
- On the Microsoft login form, log into Microsoft as an Admin.
- In Permissions requested, set consent checkbox to TRUE.
Set Force Consent Form to False
- Log into Salesforce.
- Navigate to CalendarAnything;
- Go to Settings> Integrations > Microsoft Login.
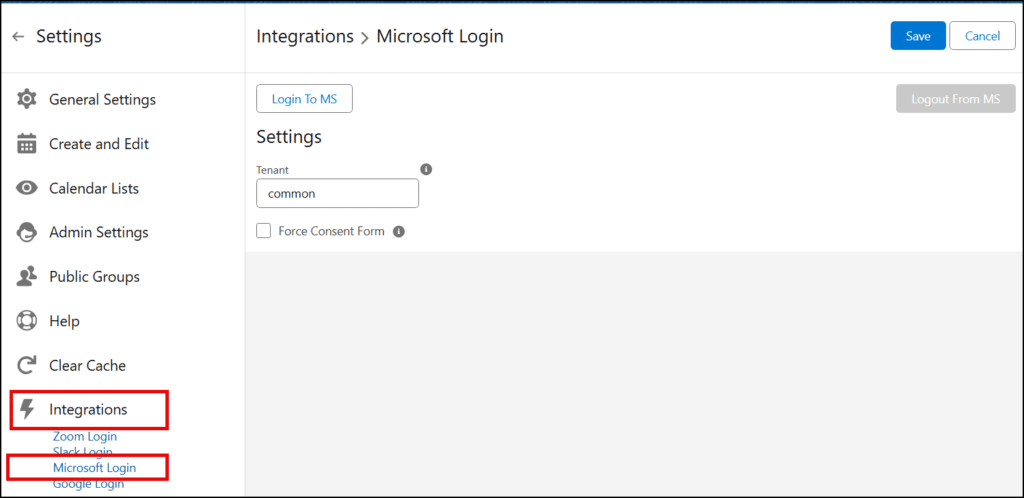
- Leave or set Force Consent Form to FALSE. Note: FALSE = blank.
- Click Login To MS and log in with Microsoft Admin credentials.
- On Permissions requested, click Accept.
Congratulations! You’ve completed the setup for the Microsoft integration with CalendarAnything LWC.