Customizing the CalendarAnything Entry Name | Classic
In this article you will learn how to:
Creating a custom entry label
Instead of showing one field on an entry label, users can join two or more fields by creating a custom entry label for their calendar. This process is two-fold: first, by creating a custom text formula; then, selecting the custom entry label in the calendar configuration set-up.
Step 1: Create a custom text formula
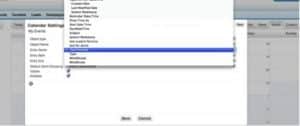
In Salesforce, go to Setup. Then go to App Setup > Customize > Activities > Activity Custom Fields.
Click the New button to create your custom field.
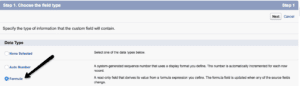
Select the Formula button and then click Next.
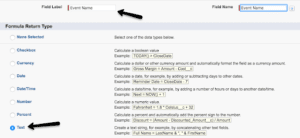
Give the field label a name and under the formula return type, select the Text button. Click Next.
Select the Advanced Formula tab and insert any fields from the Insert Field button.

In the example below, the Subject and Location fields are used.
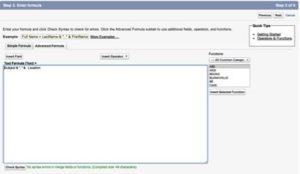
*Be sure to click the Check Syntax button.
Assign field-level security.
Select the page layouts that should include this field.
Click Save when you’re done.
Step 2: Select the custom entry label for your calendar
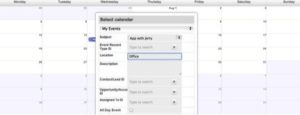
Select the Edit button for the calendar that you want to add the custom entry label.
In Step 2. Object & Entry Details, select the custom text formula you created from the entry label drop down menu.
Now your new custom entry label will be saved for new and existing field entries on the calendar you selected.
Using an icon formula field to add icons to the calendar entry name
In CalendarAnything, you can display a small graphic in the calendar events.
Locate an image, preferably a square image in .png format. If the format is not .png, it is recommended that you use an image editor such as photoshop or pixlr.com to remove any background color.
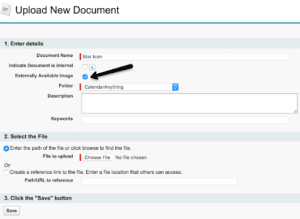
Once completed, upload the image to the CalendarAnything folder in the Salesforce Documents tab. You may name the image any name you would like in order to help you identify it later. Check the Externally Available Image box as shown in the screenshot below.
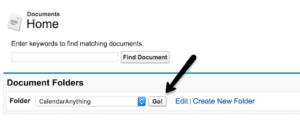
Save the image and go back to the Documents tab. In the Document Folders section, select the CalendarAnything folder from the drop down and click Go.
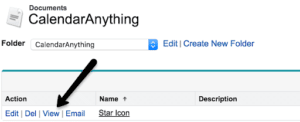
After you have clicked Go, you will be redirected to the contents of the CalendarAnything folder. Select the View link next to the uploaded image.
A new tab will open in your browser with the image selected. The URL will look something like this: https://na20.content.force.com/servlet/servlet.FileDownload?file=01530000002LPP3
Copy everything beginning from the /servlet until the end of the URL so your link now looks similar to the following text: /servlet/servlet.FileDownload?file=01530000002LPP3.
Save this segment on a notepad or in your email as you will need it shortly.
Step 1: Create the field
Create a new Field in your calendar events object with the type as Formula and click Next.
Note: If you are using standard tasks or events, you must create the custom field under Activity Custom Fields.
Step 2: Name the field
You may name this field according to your business or one which will help you distinguish it from other fields. Some examples are Activity Name or Event Name with Icon. At the bottom of page, select the data type of Text and click Next.
Step 3: Write your formula
Use the IMAGE formula function.
The first portion of your formula will use the URL you copied from your document.
IMAGE(/servlet/servlet.FileDownload?file=01530000002LPP3
Place your URL in double quotes to avoid errors.
The second portion of your formula must contain text which describes the icon (e.g. Star Icon). Again, the text must contain double quotes.
IMAGE(/servlet/servlet.FileDownload?file=01530000002LPP3, Star Icon
Next, indicate the icon height and width in pixels. 10 usually works best within the Calendar View; however, feel free to adjust as you see fit and continue to make changes after you have completed all the steps to customize to your liking.
IMAGE(/servlet/servlet.FileDownload?file=01530000002LPP3, Star Icon, 10, 10)&
After the ampersand, you can include any field that you want displayed directly on the Calendar Event when viewing a Calendar.
In this example, we will use Name.
IMAGE(/servlet/servlet.FileDownload?file=01530000002LPP3, Star Icon, 10, 10)&Name
Select the Treat blank fields as blanks in the Blank Field Handling section and select Next.

Step 4: Visibility
You may give access to all profiles or limit it to the profiles which view the calendar and select Next.
Note: if you do not provide access to the profile, but users can view the calendar, the calendar will not appear to have a name.
Step 5: Add to page layouts
Determine whether or not you want to add this field to any page layouts for the object. Deselect page layouts since this field will only be used for the calendar and hit Save.
Once the steps above are completed, navigate back to your calendar tab and select the calendar you wish to edit and click Edit from the calendar dropdown.
Go to Step 2 of the calendar edit wizard and select the formula field you just created as the entry name and save the calendar. Your calendar should now have icons in the entry name similar to the image below.
![]()
Should you wish to have icons determined by a Type field, you may upload several icons and use IF statements to separate the image formulas.