Custom Grouping for Admins
If your business has requirements that go beyond our out-of-the-box features, reach out - we offer custom development services for CalendarAnything to meet your unique needs.
A Custom Grouping is a named set of grouping options, and in some cases, filtering criteria created by a CalendarAnything administrator. Calendar users can select a Custom Grouping when using the Day Grouping, Gantt, Swimlane, or Kanban calendar views.
Custom Groupings can be configured to show empty groups—groups that meet filter requirements but have no records. Records in Swimlane and Kanban views can be moved to an empty group and automatically be reassigned to the new group. Custom Groupings can also be configured with filters, including dynamic filters.
In this article:
Related demo
![]()
How to create a Custom Grouping
Follow these steps to create a Custom Grouping:
- Navigate to CalendarAnything Settings > Admin Settings > Custom Grouping. Initially, you’ll see a page listing any existing Custom Groupings.
- Click + Add. A blank row appears for you to enter a name for the new grouping.
- Enter a name that indicates to the users what the grouping does.
- Click the Edit icon for the new custom grouping. A popup prompts you to add Grouping Settings.
- Click + Add Group By on the popup. The Custom Grouping popup appears.

- Enter the Source Object—the object with the data.
- Select a Group by field. An add button appears to add filters.
- If you want to add a filter for the records being grouped:
- Click the +Add button under Search Criteria.
- Select a filter field from Field Name.
- Select an Operator.
- Select a filter value in the field to the right of Operator or click the chevron icon to use a dynamic value.
- To add another filter, click +Add again.
- If you added multiple filters, click Add Filter Logic to apply And/Or logic.
- If you want to include groups even if they have no records, select the Add Empty Group checkbox.
- To add additional fields to the group label, select the fields from the Available panel. For example, you may want to see Account Name and Account Number for each group. Selections are moved to the Selected panel.
- Click Save when finished.

Custom Grouping Examples
These calendar examples were created using the Custom Grouping shown above.
-
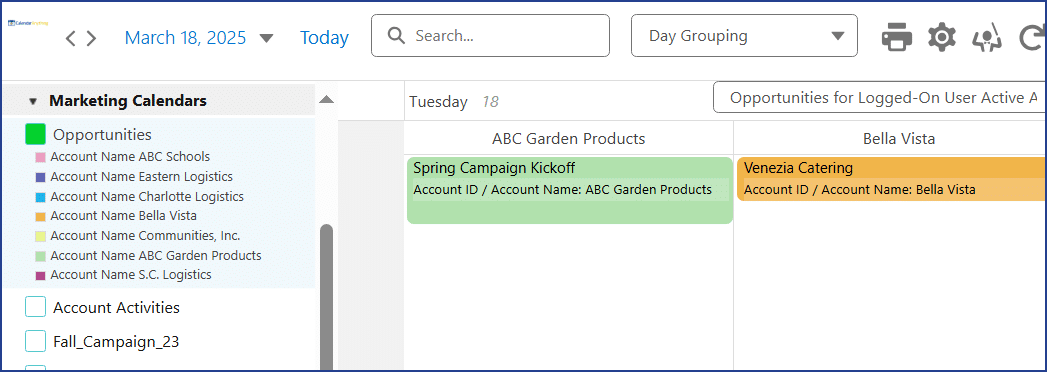
This image shows an example of Day Grouping with the Custom Grouping selected. The Custom Grouping name appears on a row above the records.
-
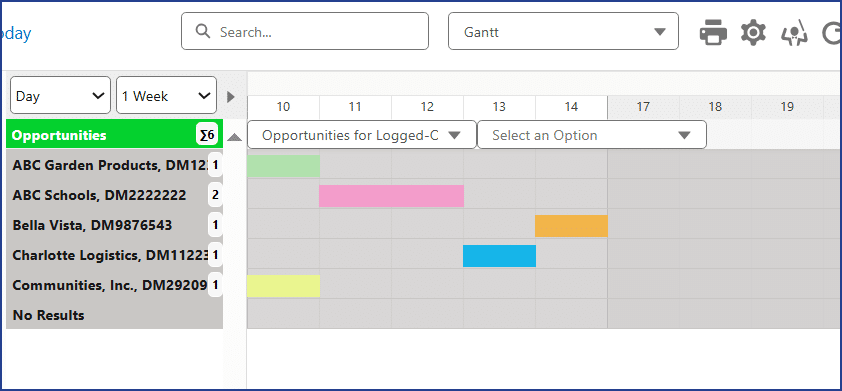
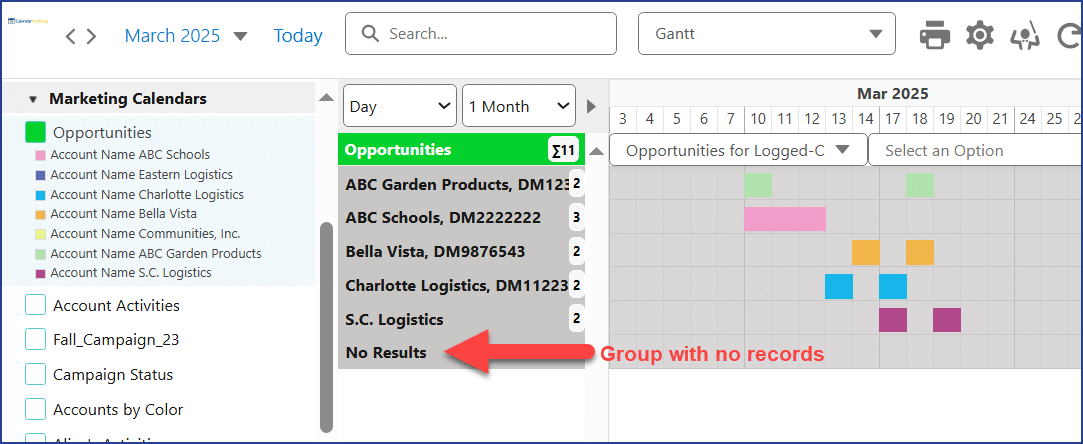
This image shows an example of Gantt View with the example Custom Grouping selected. An empty group in Gantt View is labeled No Results. Click the label to expand.
-
This image shows an example of Swimlane View with the example Custom Grouping selected. An empty group in Swimlane View is labeled with the group field name.
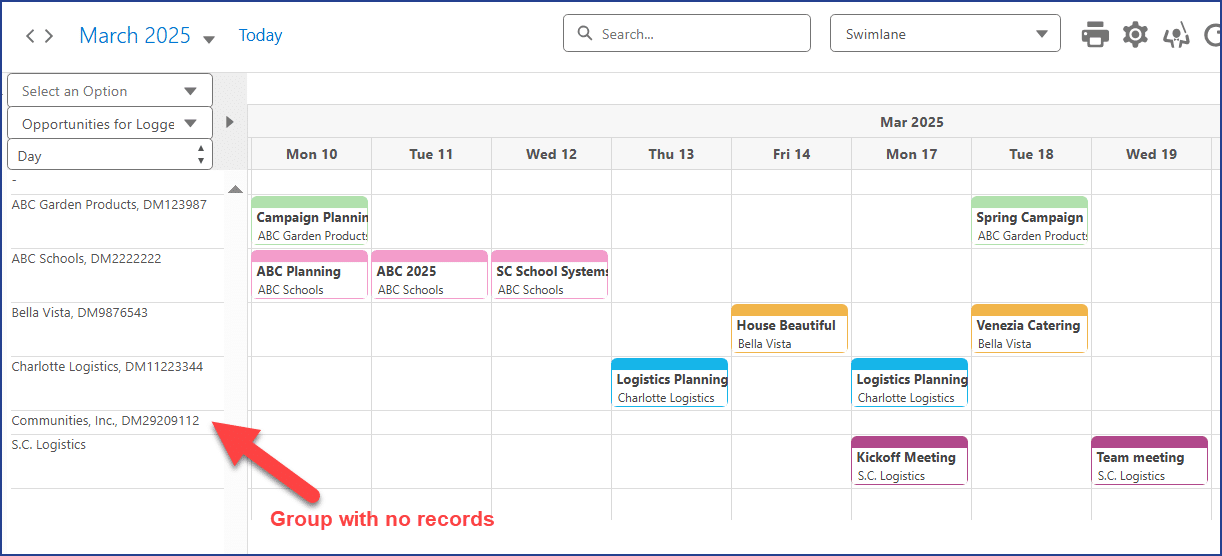
In this view, you can drag a record to an empty group. The application automatically reassigns the record to the new group.

-
This image shows an example of Kanban View with the example Custom Grouping selected.
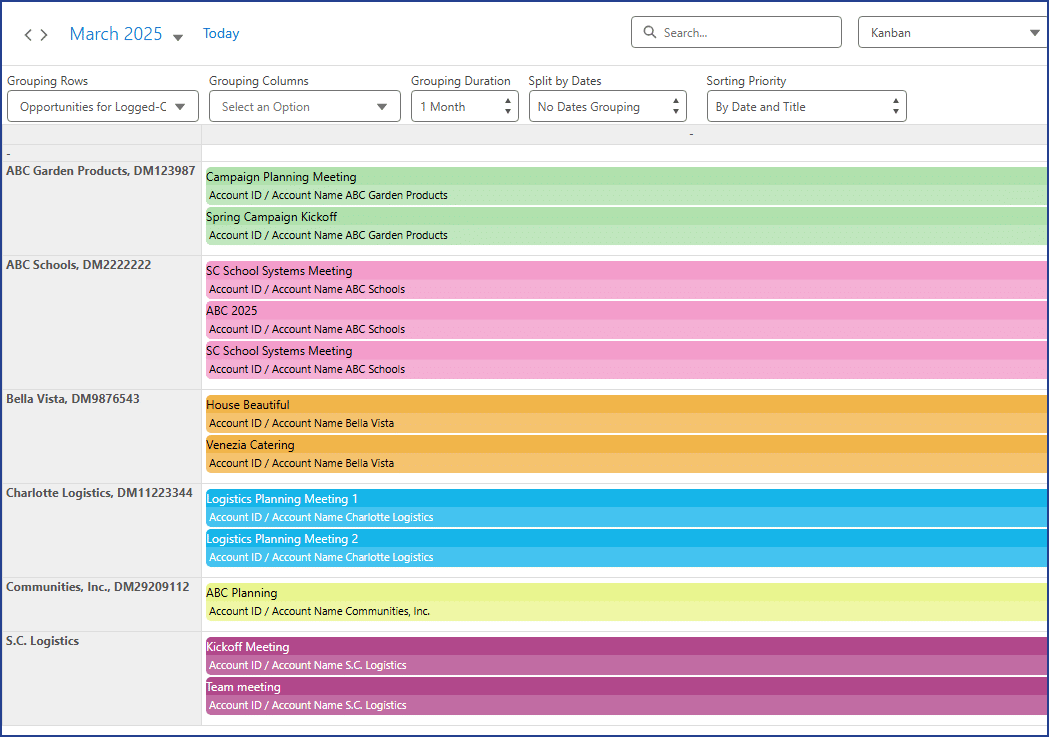
In this view, you can drag a record to an empty group. The application automatically reassigns the record to the new group.
How to use a Custom Grouping
To use a custom grouping from a calendar view that supports grouping, follow these steps:
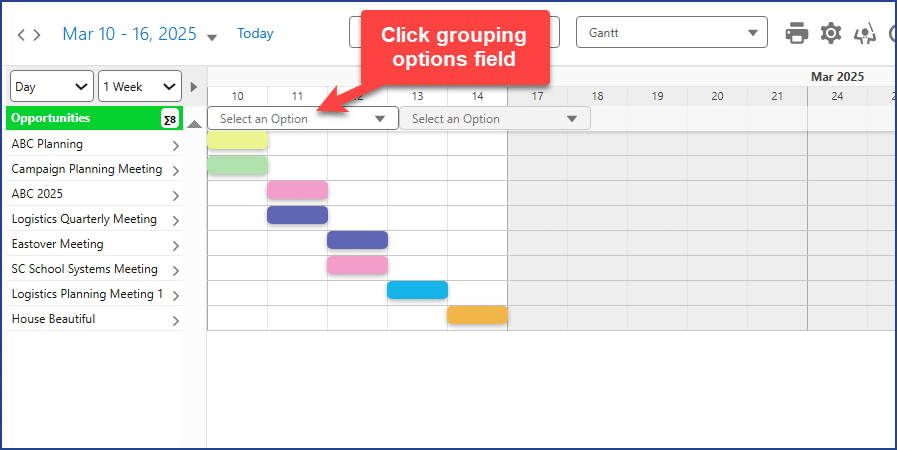
- Click the grouping option field.
- Expand the Custom Grouping option.
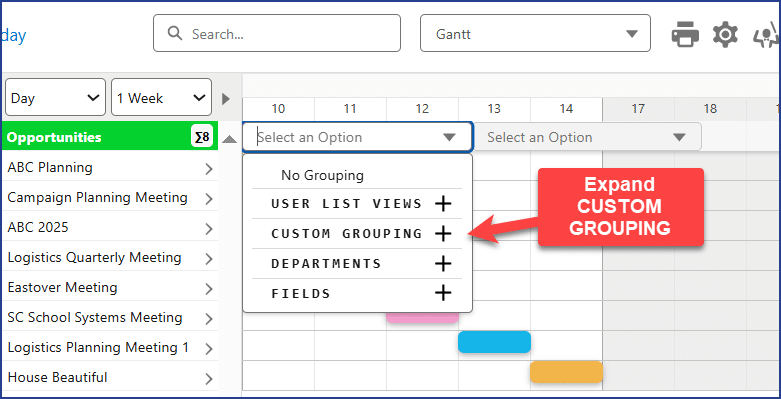
- Choose the Custom Grouping.

The Custom Grouping will be applied to the view.