CalendarAnything Advanced Admin Configuration Guide | LWC
If your business has requirements that go beyond our out-of-the-box features, reach out - we offer custom development services for CalendarAnything to meet your unique needs.
Overview
CalendarAnything LWC is a Salesforce.com application available for download from the AppExchange at HTTP://APPEXCHANGE.SALESFORCE.COM/. A primary feature of CalendarAnything LWC is the ability it provides users to create calendar views from any standard or custom objects that have a date or date/time field.
Intended audience
This guide targets an audience of system administrators with a basic understanding of CalendarAnything LWC functionality. To implement the features described in this guide, the user must have system administrator access to the Salesforce organization on which the application is installed.
For end user information, refer to Getting Started with CalendarAnything LWC.
Supported editions
Salesforce.com users, including those with assigned licenses, must have one of the following CalendarAnything LWC versions:
- Enterprise Edition
- Unlimited Edition
- Force.com
- Platform Edition
- Developer Edition
CalendarAnything LWC objects
This chart shows some commonly required CalendarAnything LWC objects, their descriptions, and permissions that can be set.
| Object | Description | Permissions Needed |
|---|---|---|
| CA_Calendar | Main object used to store Standard calendars. | Read, Create (if creating calendars), Edit, Delete (if deleting calendars). |
| CA_HoverFields | Stores fields that display on the “hover” dialog. | Read, Create, Edit, Delete. |
| CA_CreatingField | Stores fields used on the “Quick Create” popup when creating events from the CalendarAnything page. | Read, Create, Edit, Delete. |
| CA_CalendarToken | Stores calendar token. | Read, Create, Edit, Delete. |
| CA_Filters | Stores information about calendar filters. | Read, Create, Edit, Delete. |
| CA_Groups | Stores information about calendar groups. | Read, Create (if creating calendar groups), Edit, Delete. |
| CA_UserSettings | Stores user settings such as a list of visible calendars. | Read, Create, Edit, Delete. |
| CA_WebCalendar | Stores a list of Web calendars. | Read, Create, Edit, Delete. |
| CA_Availability | Stores a list of Availability calendars. | Read, Create, Edit, Delete. |
Configuring access and permissions
To enable users to create calendar views and pages to display those views, these areas of access control must be addressed:
- Organization-Wide Defaults
- The CalendarAnything LWC Default Permission Set
- Access to Apex classes and VisualForce pages
Organization-Wide Defaults
Salesforce sets Organization-Wide Defaults to application objects. The Organization-Wide Default settings for CalendarAnything LWC objects should be set to Private for both internal and external access. This ensures limited default access and enables the system administrator to broaden access appropriately.
Follow these steps to check the default access and change as necessary:
- Navigate to Setup > Security > Sharing Settings.
- Click Edit in the Organization-Wide Defaults section.
- Make sure that access is set to Private in the Default Internal Access and Default External Access columns for CA_Calendar, CA_Groups, CA_WebCalendar, and CA_Availability objects.
CalendarAnything LWC Default Permission Set
The CalendarAnything LWC application comes with the CalendarAnything LWC Default Permission Set. This set contains permissions to CalendarAnything LWC objects that are generally required for CalendarAnything LWC users. When added to the user record, this Permission Set allows creating and editing of calendars, subject to other object permissions and sharing rules.
Viewing the CalendarAnything LWC Default Permission Set
To view the permissions granted by the CalendarAnything LWC Default Permission Set, follow these steps:
- Enter Permission Sets into the Salesforce Quick Find field.
- From the results, select Permission Sets. The Permissions Sets page appears.
- Select the CalendarAnything LWC Default Permission Set. The selected permission set page appears.
- On the permission set page, in the Apps section, select Object Settings. The Object Settings page appears.
- Scroll the list to see permissions granted by the CalendarAnything LWC Default Permission Set.
- The CalendarAnything LWC objects, begin with CA_.
- To see current permissions for a CalendarAnything LWC object, select the Object Name. The permissions page for the selected object appears.
Assigning the CalendarAnything LWC Default Permission Set
To learn how to assign the CalendarAnything LWC Default Permission Set to a user, refer to Assigning the CalendarAnything LWC Default Permission Set.
In Lieu of the CalendarAnything LWC Default Permission Set
If you choose not to use the default permission set, you can manually assign CalendarAnything LWC permissions at the profile or individual user level. You must first learn which permissions are needed. You can see the CalendarAnything LWC Default Permission Set permissions by following the steps above. Refer to CalendarAnything LWC Objects to see a list of commonly used objects.
Here is how you would assign permissions to a profile.
- From the Salesforce settings menu, select Users > Profiles.
- Select the profile.
- On the Profile page, click Edit.
- Use this page to manually set permissions for the selected profile.
- Click Save when finished.
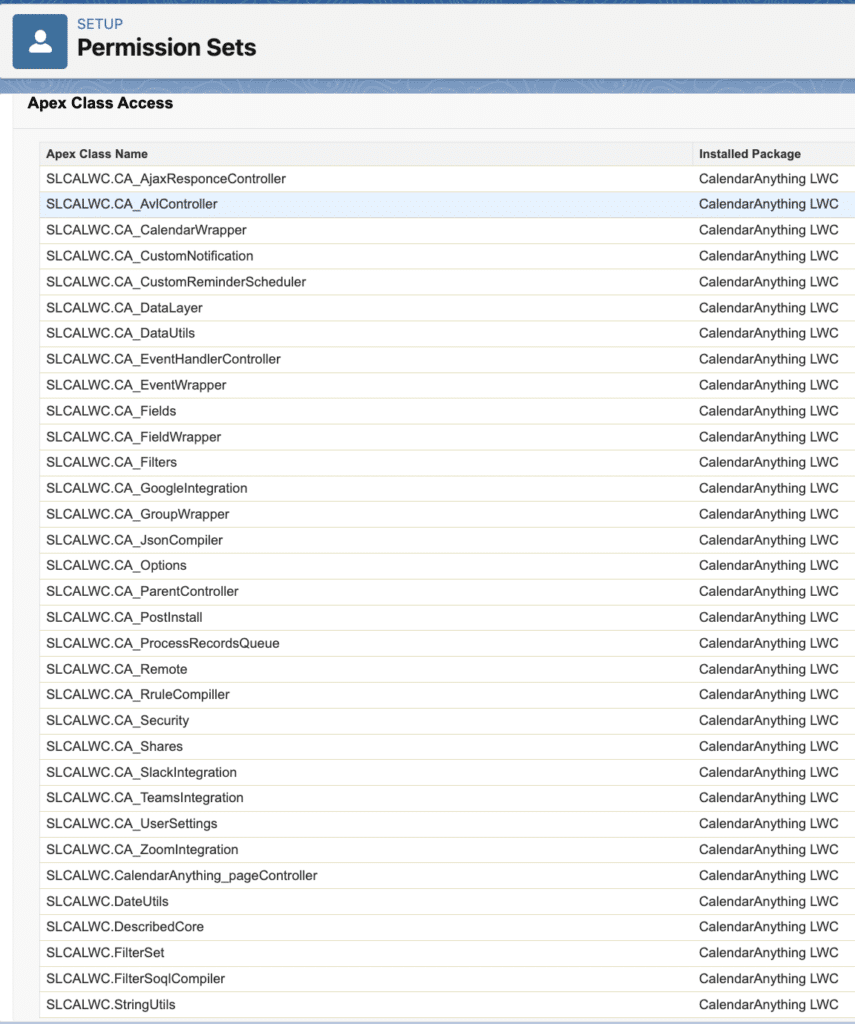
Apex Class Enablement
You must enable Apex Class access for all CalendarAnything LWC components (those with the SLCALWC.CA_ prefix).
This image shows an example of the Enabled Apex Class Access page.
You must also enable Visualforce Page Access for all CalendarAnything LWC components that have the SLCALWC prefix.

Publishing CalendarAnything LWC on Force.com
Available in: Developer, Enterprise, and Unlimited editions ONLY.
CalendarAnything LWC can be displayed on a Force.com site. Doing this takes three steps:
- Creating a Lightning application
- Creating a Visual Force page
- Creating a Force.com site page
Creating a Lightning Application
Follow these steps to create a Lightning application:
- Navigate to Salesforce and click the gear icon in the top right corner. Then choose Developer Console from the dropdown.
- In Developer Console, Click File > New > Lightning Application.
- On the New Lightning Bundle popup, enter a Name for the application and make sure to check the Lighting Out Dependency App checkbox.
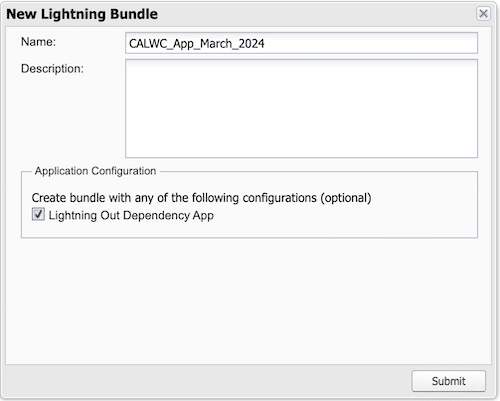
- Click Submit. The popup closes and a page similar to the one below appears.
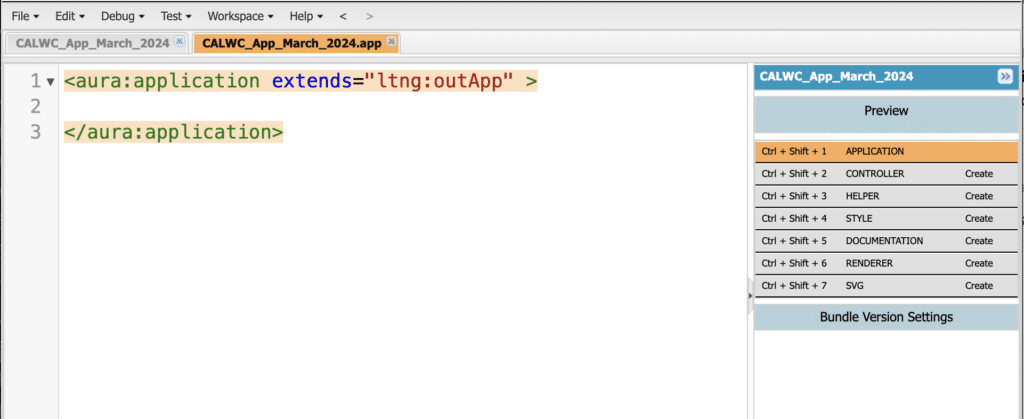
- Remove all of the highlighted code from the text area.
- Into the blank area, copy and past the following code:
<aura:application access="GLOBAL" extends="ltng:outApp" implements="ltng:allowGuestAccess" /> - Click File > Save.
Creating a VisualForce Page
To create a VisualForce Page, follow these steps:
- Navigate to Setup > VisualForce Pages > New.
- Fill in the fields in the Page Information section.
- Check the box labeled Available for Lightning Experience, Lightning Communities and the mobile app.
- Copy the sample code below from <apex:page> to </apex:page>. You will need to change the sample calendar IDs to your Calendar IDs.
<apex:page >
  <apex:slds />
  <apex:includeLightning />
  <div id="calLightning" class="wrapper"></div>
  <script>
    var calendarApi = null;
    // Create custom app and expose it to VisualForce
    $Lightning.use("c:calendarLWC", function () {
      // add some settings
      let userAdditionalSettings = {
        displayTimeZone: true,
        dayModeArea: "0_1",
        readonly: {
          move: false
        },
      };
      $Lightning.createComponent(
        "slcalwc:calLoader",
      {
      //These are just example IDs and should be replaced with your CalendarIDs
      calendar: "a024T00000257LDQAY, a024T00000257LFQAY",
      //These are just example IDs and should be replaced with your CalendarIDs
      enabled: "a024T00000257LDQAY, a024T00000257LFQAY",
      // The default start view mode
      view: "Month",
      showModeSelector: true,
      userAdditionalSettings: JSON.stringify(userAdditionalSettings),
      height: "800px",
      //uncomment to hide sidebar or pass additional url params
      // urlparams: "sb=2",
        func: {
          ready: function (oApi) {
            calendarApi = oApi;
          },
        },
      },
      // id of div you want to put new Lightning element
      "calLightning",
      (cmp) => {
      // callback for create element
      //(NB calendar load event is not equal to this)
      // to execute something after calendar is loaded use ready
      console.info("created");
      }
    );
  });
</script>
</apex:page>
The sample code above includes Calendar IDs that must be replaced with your calendar IDs.
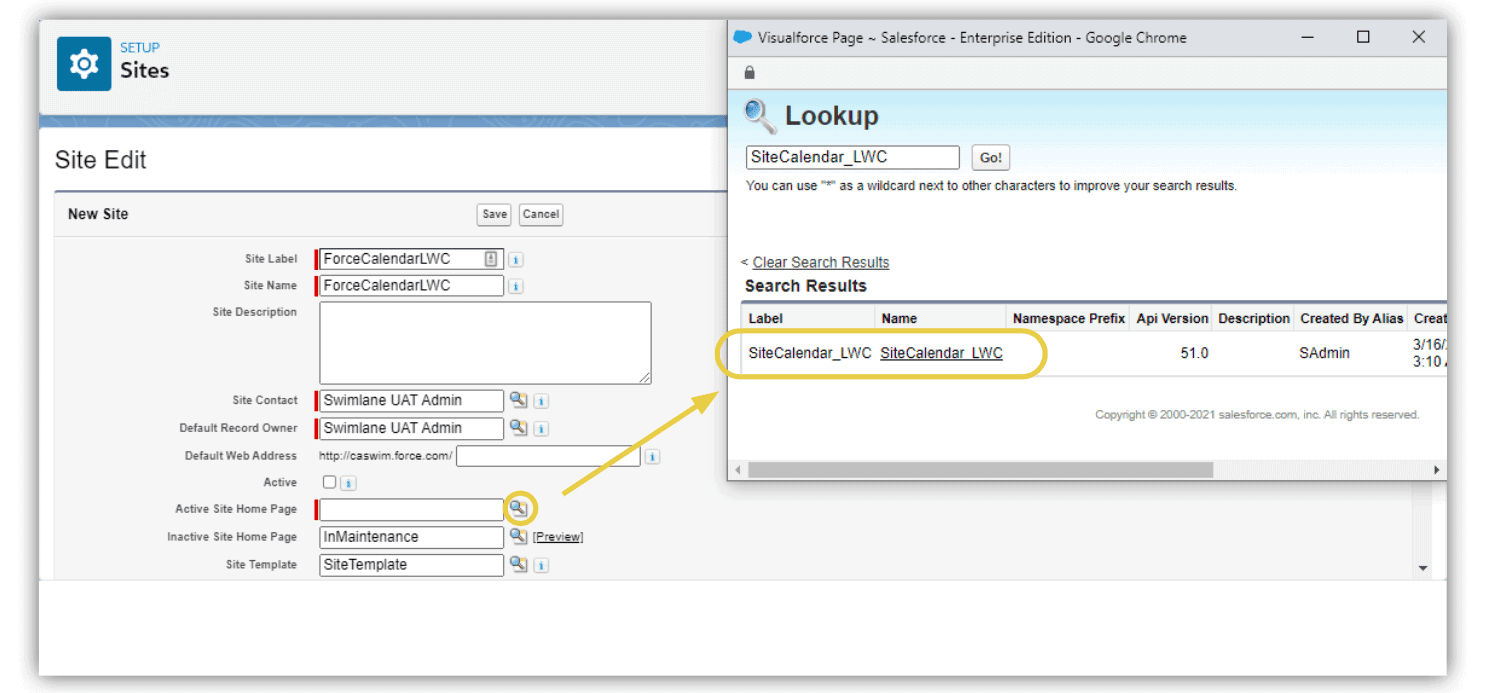
Creating a Force.com site page
To make your CalendarAnything LWC public, you must create a force.com site page. This can be an existing page or a new one. To set up your Force.com site, refer to SALESFORCE’S SETTING UP SALESFORCE SITES.
Once the site is ready for setup, perform the following steps:
- Replace the Active Site Home page with the new VisualForce page.
- Click Save. Your site is ready to be published.
Note: If your site is brand new, you must configure Sharing Rules as well (see next section).
Creating Sharing Rules for your Force.com site Guest Site User
If your Force.com site is brand new, follow these steps to configure Sharing Rules:
- Navigate to Setup > Sharing Settings. The Sharing Settings page appears.
- Click Edit next to Organization-Wide Defaults.
- Scroll to the Other Settings section and make sure the Secure Guest User Record Access checkbox is checked.
- Click Save.
Creating a Sharing Rule for CA_Calendar Object
Fill in the Sharing Rule label. The criteria defines what will be shared with your site user and depends on your use case. In this example, the rule being created gives the Guest Site user access to all calendars. Please make sure you are sharing with the right Guest Site user.
Once shared, the Guest Site user can access the calendars but not the records displayed on the calendar. You must replicate the process for each object that feeds into the calendar.