Create, Edit, and Share Calendars | Classic
In this article you will learn how to :
- Create a new calendar
- Edit an existing calendar
- Share calendars within your organization
- Create and edit entries
- Drag and drop entries
Troubleshooting:
Creating A New Calendar
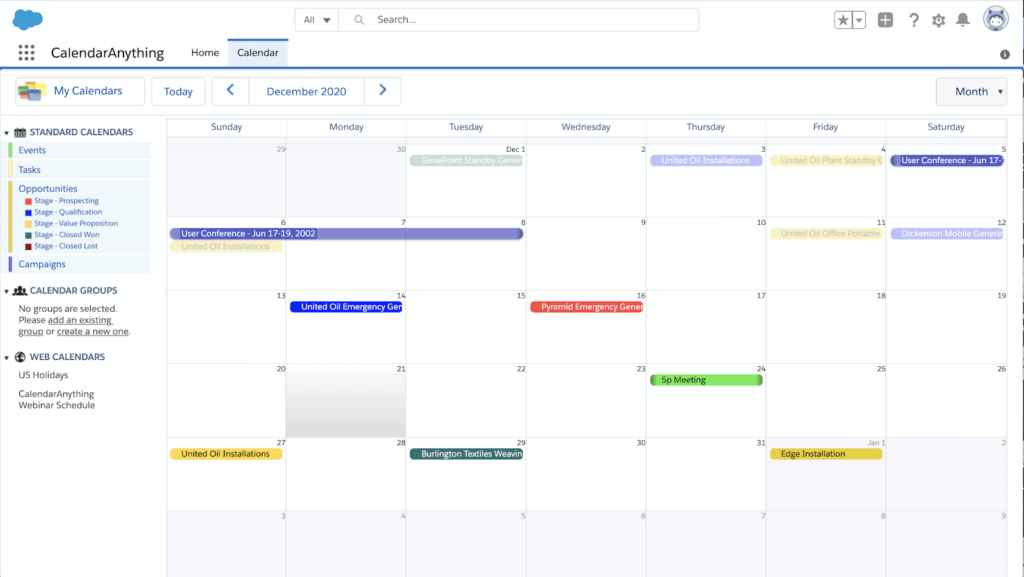
To begin creating a calendar, click the My Calendars button to open the menu and select the Calendar Controls option.
The Calendar Controls page shows a list of previously created calendars, groups, and Web calendars. Icons on the left side allow licensed users to “Edit,” “Clone,” or “Delete” a calendar.
To create a new calendar, click the Add Calendar button at the bottom of the Calendar Controls page.
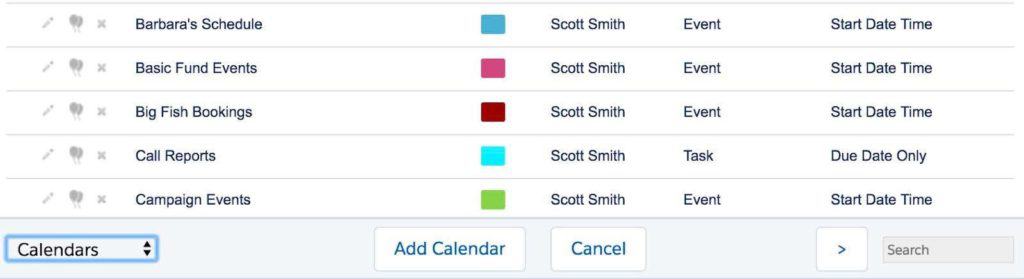
Calendars Control page.
You’ll see a Calendar Settings dialog box appear on your screen.
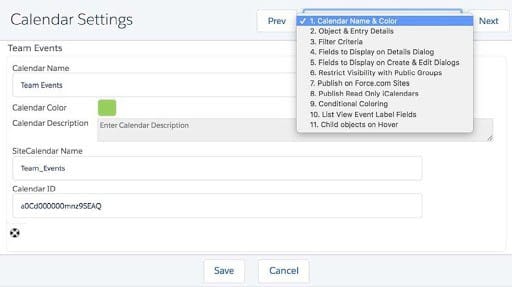
Calendars Settings page
Step 1: Calendar Name & Color
Enter a Calendar Name. Choose a Calendar Name that does not contain +, &, / or = characters. Select a color from the available colors or create a color from the color wheel. You can also use a custom RGB Code.
Note: The Site Calendar Name field, used to publish public Site Calendars, automatically populates when you enter a Calendar Name. Learn more on publishing to a public site.
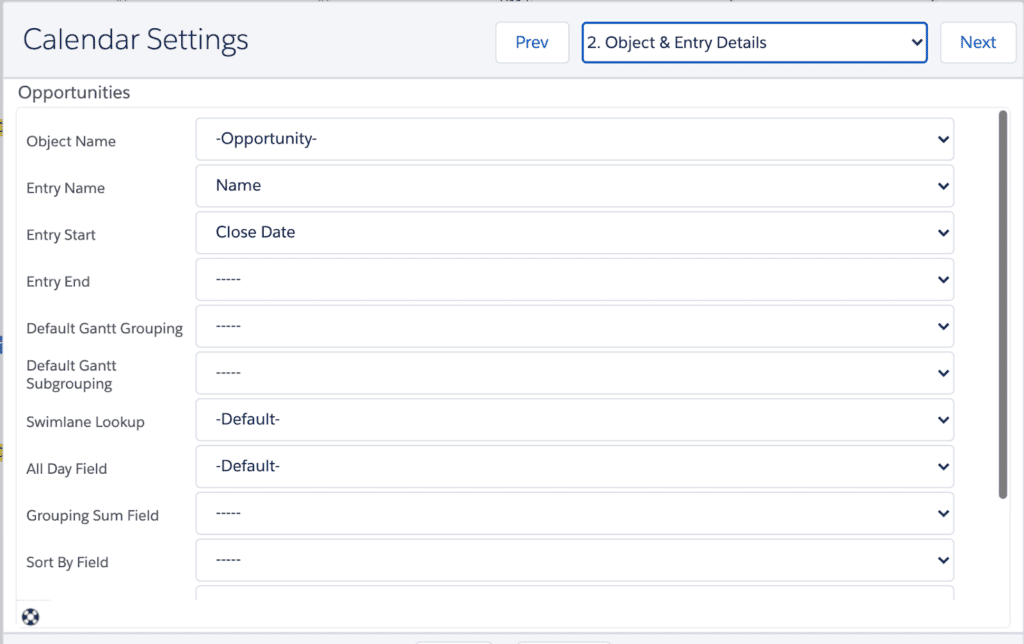
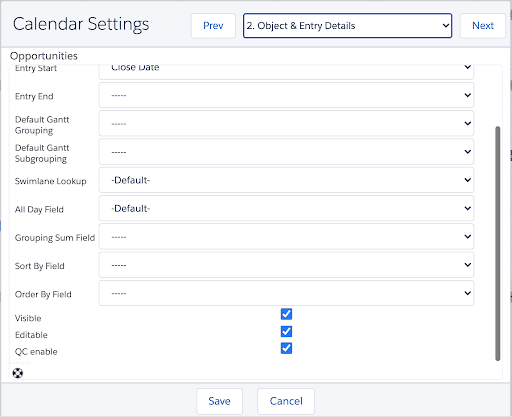
Step 2: Object & Entry Details
Select the Object and Entry Details for the calendar you are looking to create within CalendarAnything. Create your calendar using standard or custom objects, as long as the day/time field is available. The object you select determines the fields that will be available in following steps.
- Entry Name select from the available fields.
- Both the Entry Start and Entry End fields must be the same format, such as date fields or date/time fields.
- Default Gantt Grouping relates to the Gantt view feature and allows you to determine which field to use for grouping records in Gantt view. (This field is not required.)
- Default Gantt Subgrouping relates to the Gantt view feature and allows you to determine which field to use for subgrouping the grouped records in Gantt view. (This field is not required.)
- Swimlane Lookup enables users to select any user lookup field on an object for Swimlane view.
- The All Day field controls if the calendar Event is all-day or at a specific time.
- The Grouping Sum field determines what field will be used as a summarizing field for Gantt Grouping.
- The Sort By field determines how calendars appear in the +more details pop-up, such as sorted by color or alphabetically.
- Events Sorted By Subject looks like this:

- The Order By field determines how calendars display in the +more pop-up, similar to the Sort By field.
- The Visible box determines if the calendar will be available for other CalendarAnything licensed users to display in their left panel. Leaving this box unchecked effectively marks the calendar as “private.”
- The Editable box determines if other users are able to drag and drop records or create new records when viewing the calendar.
When you select an object, CalendarAnything will only display fields from one object at a time.
Step 3: Filter Criteria
Specify Filter Criteria. This allows you to filter through object records and display only relevant records. You may filter an event based on the fields available in your selected object.
Note: You can add up to 29 filters per calendar.
Step 4: Fields to Display on Details Dialog
Specify Fields To Display On Details Dialog. Control which fields, if any, display when a user clicks on a record in CalendarAnything.
Step 5: Fields to Display on Create and Edit Dialog
Specify Fields to Display on Create and Edit Dialogs. Check the “Editable” box so users can create records when selecting a date or date range on the calendar. Here, you may specify which fields are available for users to create records within CalendarAnything. Some Salesforce objects have required fields, which may not be removed from the “Selected” box. Learn more on creating and editing entries.
Step 6: Restrict Visibility with Public Groups
CalendarAnything utilizes Salesforce’s Public Groups feature to share calendars within your organization. To use this feature, your system administrator will first have to create public groups in Salesforce.
When creating and editing a calendar, you can then decide who will be able to see your calendars in their Display Settings. Users can then move calendars from ‘Available’ to the ‘Selected’ section to display them on the calendar sidebar.
Step 7: Publish on Force.com Sites
Publish on Force.com Sites. Display a read-only web version of the calendar on a Salesforce sites page. To do this, you’ll have to:
- The Site user is licensed for CalendarAnything
- The Site user is a member of a Public group that has access to this calendar (see Step 6)
- The Site profile has access to all the CalendarAnything Visualforce pages and Apex classes
- The Site profile has read access to all CalendarAnything custom objects
- The Site profile has read access to all objects and fields referenced by the calendar (step 2)
Step 8: Publish Read Only iCalendars
iCal Publishing is no longer supported by CalendarAnything.
Step 9: Conditional Coloring
This feature allows users to assign multiple colors to a single calendar based on field filter criteria, eliminating the need to create multiple colored calendars pulling from the same object using the same field for filter criteria. Read our complete Conditional Coloring guide for more details.
Step 10: List View Event Label Fields
Specify fields to display in Agenda and Swimlane Views as well as in Salesforce mobile app. See the complete how-to in our List View Event Label Fields guide.
Step 11: Child Objects on Hover
Specify the related object and fields that will be displayed on the event details hover in a separate tab. Please refer to our knowledge article on Child Objects on Hover to learn more.
Once you have entered the settings for your calendar, click “Save” to save your calendar and return to the Calendar page.
Editing saved calendars
Unless a user is a system administrator or has CalendarAnything admin rights, editing a saved calendar is limited to the owner of the calendar (the user who created the calendar).
To easily edit the calendar settings, from the main calendar page hover over the calendar you would like to make changes to. The calendar drop-down arrow will appear. Click on the arrow to open the calendar menu.
Selecting the Edit option will open the Calendar Settings page. From this menu, you can also clone and delete the calendar, display only this calendar (all other calendars will be toggled off), hide the calendar, change color of the calendar events, and add a quick filter to the calendar.

Sharing calendars within your organization
Some organizations decide to designate a “calendar admin” who is responsible for creating calendars for the rest of the team. These calendars can then be shared with the rest of the team.
CalendarAnything utilizes Salesforce’s public groups feature to make this possible. Your system administrator will first have to create public groups in Salesforce setup (e.g., according to role, hierarchy, etc.).
When creating/editing a calendar, you can decide which public groups will have visibility to the calendar in Step 6 “Restrict Visibility with Public Groups” of the calendar setup.
When a user opens CalendarAnything, they can go into their display settings (My Calendars > Display Settings, then click Calendars) and see the calendars they have available to them (shown below). Users can then move calendars to the Selected section to make them available on the calendar sidebar.
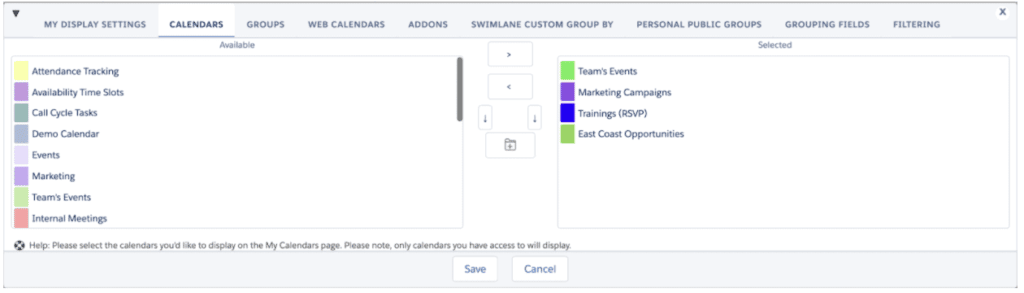
*Note: CalendarAnything follows all permissions sets in Salesforce. If a user has view only access to an object, it will be the same case in CalendarAnything. The Restrict Visibility step only controls calendar visibility, not record visibility.
How to create and edit entries
Users have the ability to create new Salesforce records and edit existing ones straight on the CalendarAnything UI. To enable this feature, the Editable checkbox needs to first be selected in Step 2 of the calendar setup.
Then select Step 5 “Fields to Display on Create & Edit Dialogs.”
From here choose the fields you want your users to fill out when creating a new record or editing an existing one. Some Salesforce objects have required fields, which may not be removed from the Selected box. Any validations rules are applicable.

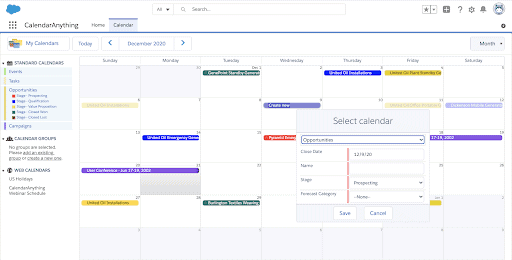
To create a new record, click on a date (or select a date range) on the calendar UI. From the dropdown select the calendar of choice.
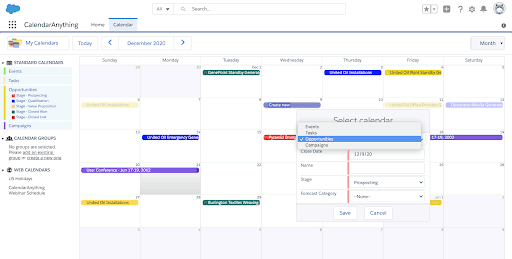
Fill out the fields (those in red are required in order to save the entry) and save your new Salesforce record.
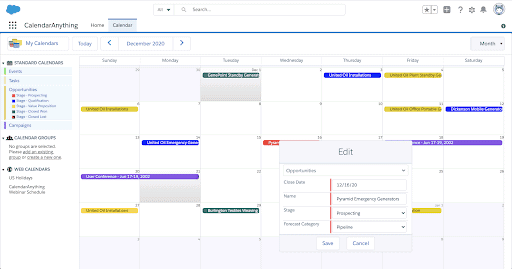
To edit an existing record, select the record of interest and then click the Edit button.
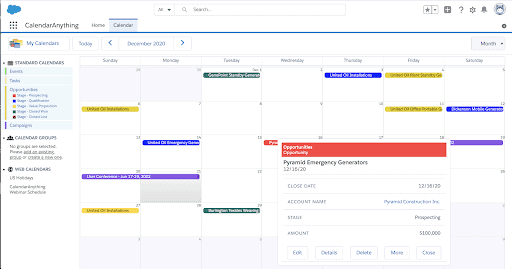
From there the edit pop-up will appear. Make the desired changes and then select Save.
As CalendarAnything is a visualization of your Salesforce data, the user must have correct Salesforce permissions to view, edit, and create entries even if the calendar is shared with them.
How do I drag & drop an event?
Users have the ability to change the date field(s) of their Salesforce records from the CalendarAnything interface by dragging and dropping. To enable this feature, the Editable checkbox needs to first be selected in Step 2 of the calendar setup.
You have the ability to change the date field(s) of your Salesforce records straight on the CalendarAnything interface by dragging and dropping them with your cursor: