Customizing the CalendarAnything Entry Name
If your business has requirements that go beyond our out-of-the-box features, reach out - we offer custom development services for CalendarAnything to meet your unique needs.
CalendarAnything users can customize the text in their calendar event entry names. They can also add small images to the entry names.
In this article:
Customize entry name text
To customize calendar entry name text, add a custom text formula field (label) to your calendar object as follows:
- Go to Salesforce > Setup > Object Manager.
- Select the object that stores the calendar events.
- Select Fields & Relationships.
- Click New. The New Custom Field Page is displayed.
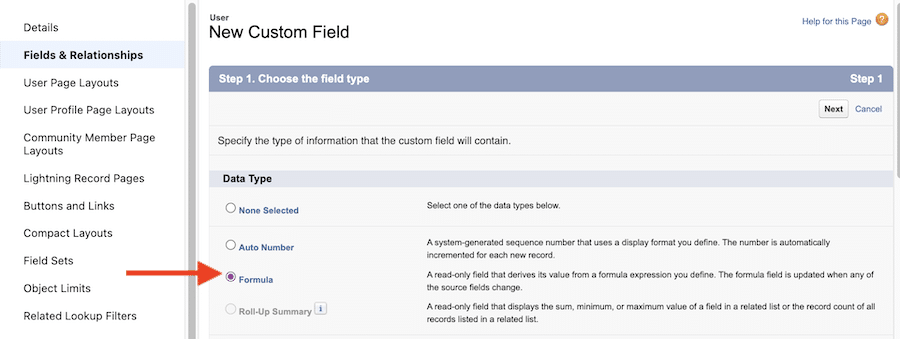
- Select Formula and click Next. The application displays Step 2 of the New Custom Field Page.
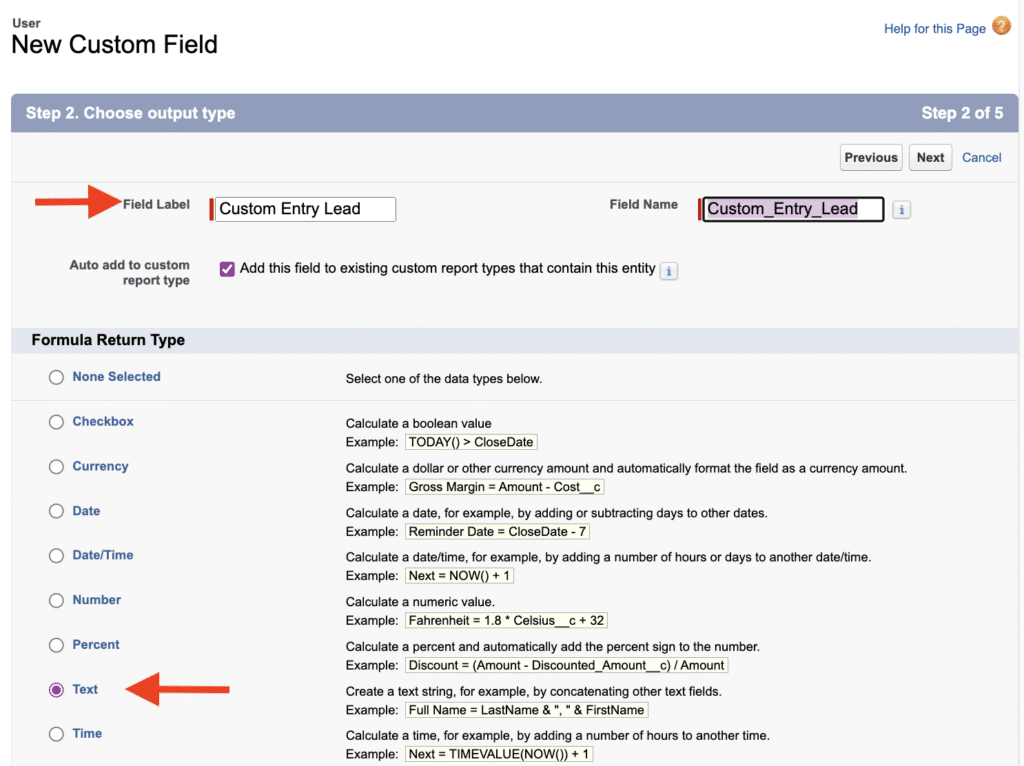
- Enter the Field Label. The application populates the Field Name.
- Either leave the generated field name as is or enter a new one.
- Select Text under Formula Return Type, then click Next. The application displays Step 3 of the New Custom Field Page.
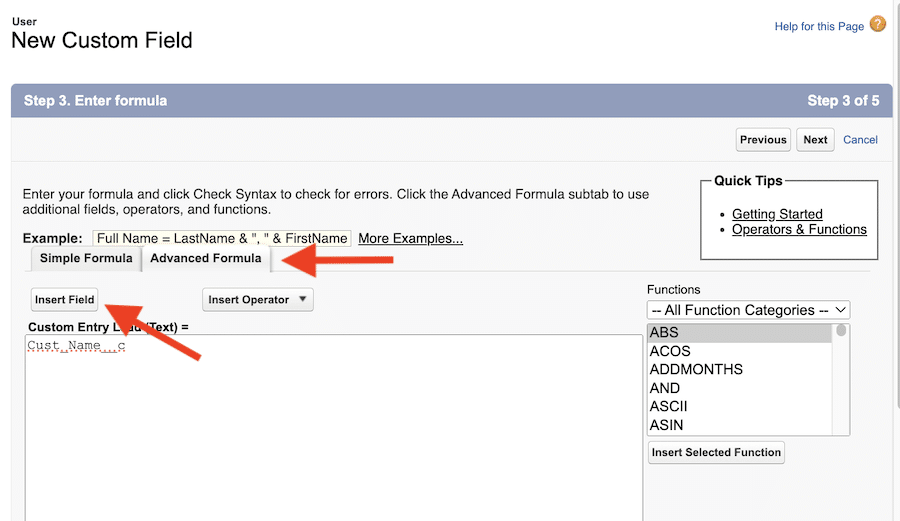
- Select the Advanced Formula tab.
- Insert fields using the Insert Field button.
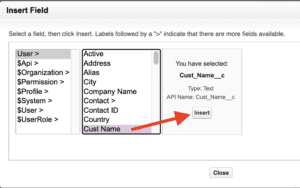
- Click Check Syntax. If there are any errors, correct them.
- Click Next. A page to assign field-level security appears.
- Assign field-level security by profile for the custom field, and then click Next. A page to add to page layouts appears.
- Determine whether to add this field to any page layouts for the object. The best practice is to deselect page layouts since this field will only be used for the calendar.
- Click Save.
Complete the process by following the steps in Configure calendar to use custom entry names.
Add images to entry names
You can add one or more small graphics to CalendarAnything entry names. First, you upload each image as a Static Resource. Then you add a custom image formula field to your calendar object.
Upload an Image as a Static Resource
To upload an image to CalendarAnything as a Static Resource, follow these steps.
- Locate the image file on your computer. The preferred file type is .png. If it is not a .png, use an image editor to remove the background.
- Go to Salesforce > Setup.
- In Quick Find, type static and select the option for Static Resources. The application displays the Static Resources page.
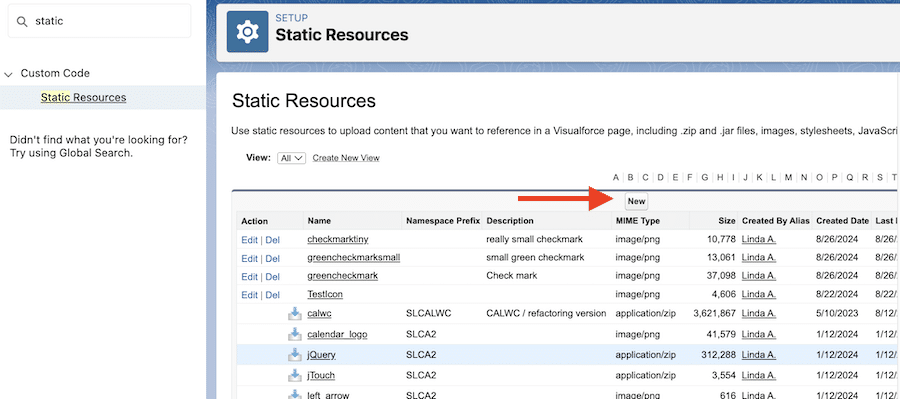
- On the Static Resources page, click New. The application displays the Status Resource Edit page.
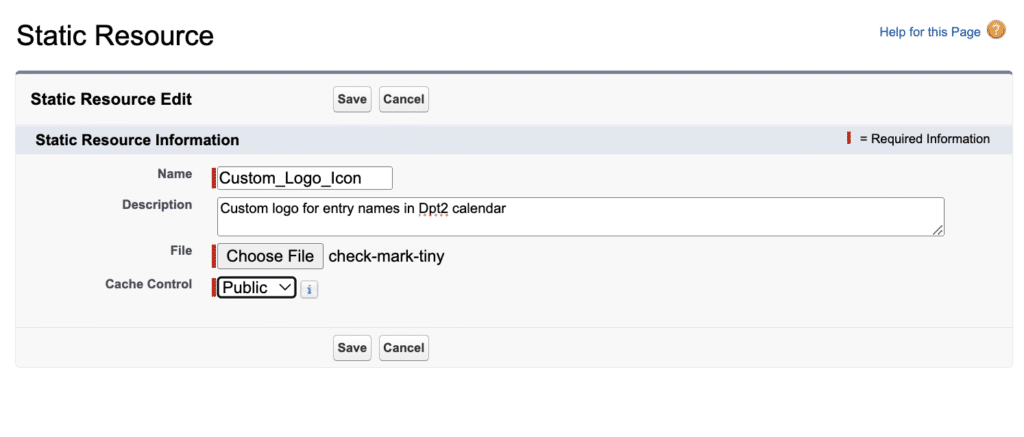
- Enter the Name and Description of the image file to be used.
- Select the image from the File field list.
- Select Public from the Cache Control field.
- Click Save. The application displays the Static Resource Detail page.

- Click View File. A new tab with the selected image is opened in your browser. The image URL will be similar in format to this: https://[your.organization].vf.force.com/resource/1721701979000/GreenLantern.
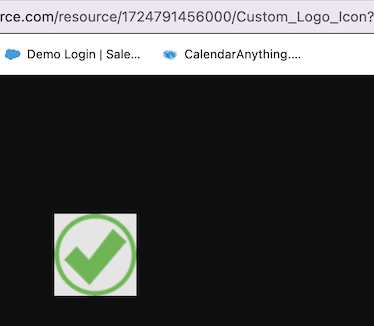
- Copy the URL into Notepad, starting with the section beginning with /resource and ending with the file name, for example /resource/1721701979000/GreenLantern.
- Delete the numbers from the URL. The result will be similar to this: /resource/GreenLantern.
- Click Save. Note! You will use this file when creating the custom formula field.
Add a custom image formula field to calendar object
The next step is to add a custom image formula field to the object on which the calendar is based.
Important! If the calendar is based on the Events or Tasks object, you must create the custom field for the Activity object.
- Go to Salesforce Setup and click Object Manager. The object list is displayed.
- Select the object on which the calendar is based. Note: Select the Activity object if the calendar is based on Events or Tasks.
- Select Fields & Relationships from the left menu. The object’s existing fields are displayed.
- Click New.
- Select Formula, under Data Type; then click Next.
- Enter the Field Label. The application populates the Field Name. You can leave the generated field name as is or enter a new one.
- Under Formula Return Type, select Text; then click Next. The application displays Step 3 of the New Custom Field page.
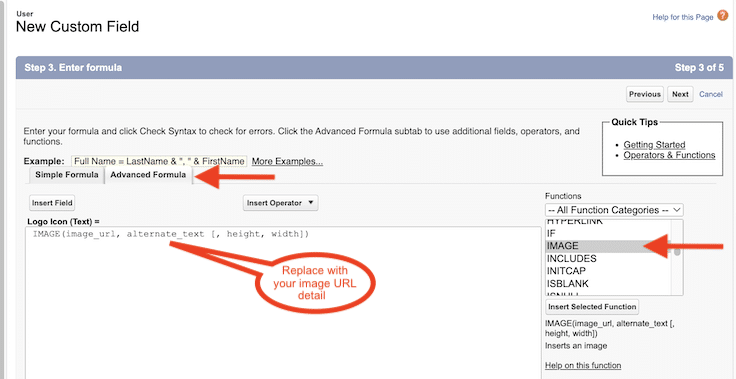
- Click the Advanced Formula tab.
- From the Functions list, select IMAGE, and double-click to insert the selected function. It will look like this:
IMAGE(image_url, alternate_text , height, width). - Replace image_url, with the Static Resource url you saved, for example /resource/GreenLantern.
- Replace alternate text with the static resource’s name, for example Green Lantern.
- You can adjust the height and width in pixels. If you choose to specify, a value of 10 for each is recommended. Your formula will now look like this: IMAGE(“/resource/GreenLantern”, “Green Lantern” , 10, 10)
Important! Should you wish to have icons determined by a Type field, you may upload several icons and use IF statements to separate the image formulas. - Click Check Syntax. If no errors are found, continue; otherwise, correct the errors and click Check Syntax again.
- In the Blank Field Handling section, select Treat blank fields as blanks. Then, click Next. A page to assign field-level security appears.
- Assign field-level security by profile for the custom field. Note: If you do not provide profile access to users who can view the calendar, it will look like the calendar doesn’t have a name.
- Click Next. A page to add the new field to page layouts appears.
- Determine whether to add this field to any page layouts for the object. The best practice is to deselect page layouts since this field will only be used for the calendar.
- Click Save.
Complete the process by following the steps in Configure calendar to use custom entry names.
Configure calendar to use custom entry names
- From the CalendarAnything sidebar, right-click the name of the Calendar you want to edit, and click Edit in the context menu. The Create and Edit wizard is displayed.
- Click the Calendar Criteria tab.
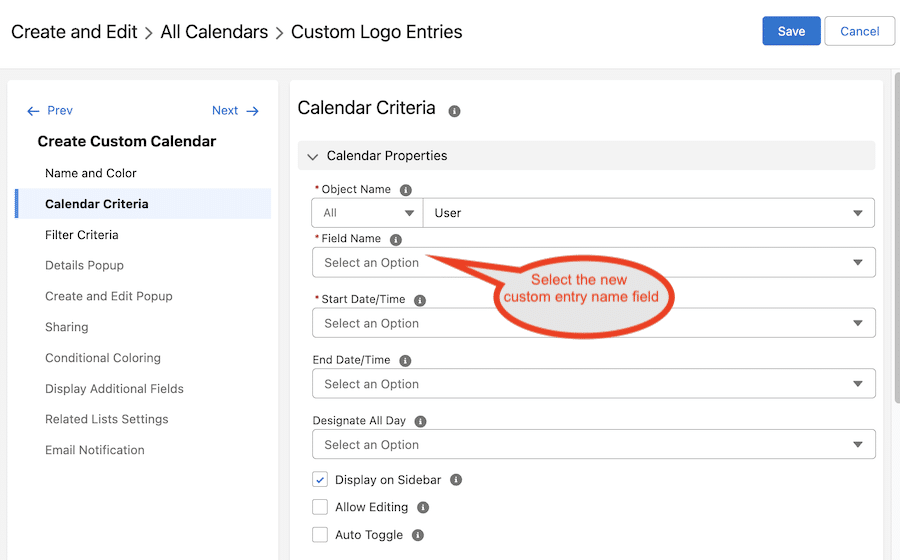
- From the Field Name list, select the new custom field.
- Click Save.
Going forward, the customized entry names will be displayed on the calendar.