Availability Calendars User Guide
If your business has requirements that go beyond our out-of-the-box features, reach out - we offer custom development services for CalendarAnything to meet your unique needs.
CalendarAnything’s Availability Scheduling feature enables users to schedule and book organizational resources, including personnel, locations, meeting rooms, and equipment, directly from an Availability calendar. Availability may consist of one resource type or as a combination of resource types, such as physicians and the clinic locations at which they are available. An Availability calendar shows the resources or resource combinations and the time slots for which they can be booked. The calendar Availability data comes from the counterpart Availability template.
This article focuses on using an Availability template to enter Availability data and on using the Availability calendar to book resources.
To learn how to create an Availability calendar, refer to Creating an Availability Calendar for Booking Resources..
In this article:
- Entering Availability Data into the Template
- Entering Availability Data for Combined Resource Types
- Setting Availability Exceptions
- Scheduling an Appointment Using an Availability Calendar
Entering Availability Data into the Template
Tips for using the Availability Template page:
- Make sure the correct name is selected on the User field before making changes.
- Click Clear (trash can icon) to delete all displayed availability.
- Remember to refresh the page if changes are not immediately displayed.
If you are responsible for entering Availability template data, whether just your own or for others as well, follow these steps:
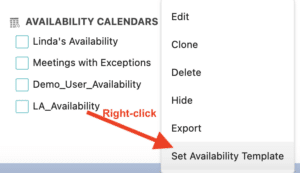
- On the CalendarAnything menu, right-click the name of the Availability Calendar and then select Set Availability Template from the context menu.
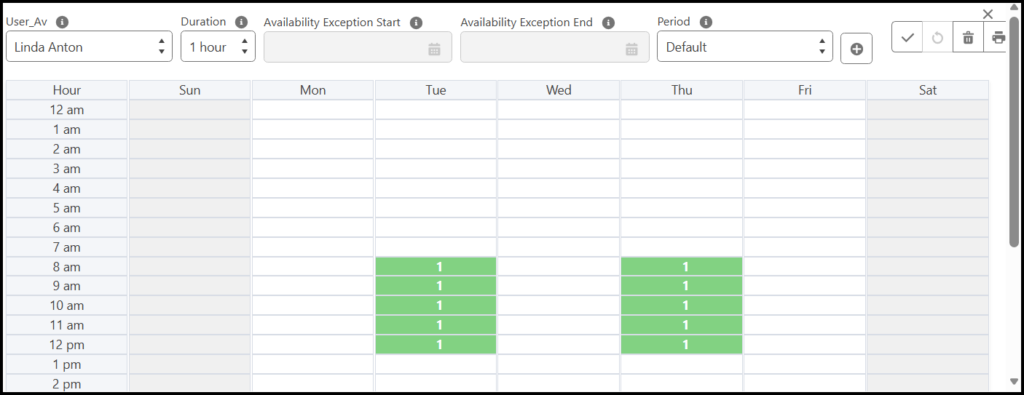
- Fields on the template depend upon configuration. If you are a personnel resource entering your own availability, select your name from the User field. If entering availability for someone else, select that person’s name.
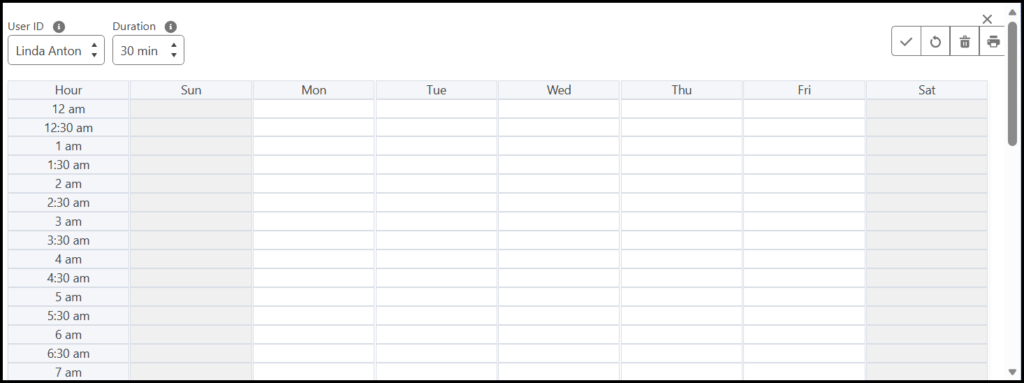
- To change the length of the time slots, select a value from Duration.
- Click the first timeslot for which you are available, for example, 9:00 am on Monday. (You may need to scroll.) The application shades the timeslot.
- Select remaining time slots in one of two ways:
- Drag your cursor from the selected slot down to where you want to end your availability for that day. Repeat for the other days. The application shades all affected timeslots and places a 1 in each of them.
– OR –
Drag left to right starting with the first slot and ending with the last slot of contiguous availability.
- Drag your cursor from the selected slot down to where you want to end your availability for that day. Repeat for the other days. The application shades all affected timeslots and places a 1 in each of them.
- To deselect a slot, such as for lunch hour, click to remove the highlight from the slot. Note: Keep in mind that there are no dates associated with availability, just default placeholders based on day of the week and time slot.
- Click Apply (the checkmark icon).
- Close the template by clicking the X in the upper right corner. The counterpart Availability calendar appears.
The number of days populated with your availability is determined by the value in the Actual Future Period (Days) setting. This setting is located on the General step of the Create and Edit Availability Calendars wizard.
Entering Availability Data for Combined Resource Types
In some cases, availability must be set for a combination of resource types. The example below shows a template for setting combined availability of account and contact.
This is just an example for learning purposes. Your organization's template requirements and field labels will most likely differ.
These are the steps you would follow to set availability in a calendar with combined resources:
- On the CalendarAnything menu, right-click the name of the availability calendar on the sidebar.
- From the context menu, select Set Availability Template. The template appears.
- Select a value from the first availability field, in this example Account.
- Select a value from the second availability field, in this example, Contact.
- Select the first timeslot for which both of the selected resources are available. The application shades the timeslot.
- Drag your cursor from the selected timeslot to where you want to end availability. The application shades all selected timeslots.
- Click Apply (the checkmark icon).
- Close the template by clicking the X in the upper right corner. The Availability calendar appears.
Setting Availability Exceptions
If the Availability Exceptions option is enabled, you can use the template to enter availability exceptions, such as for vacation and illness. To enter exceptions, follow these steps:
- On the CalendarAnything menu, right-click the name of the calendar on the sidebar.
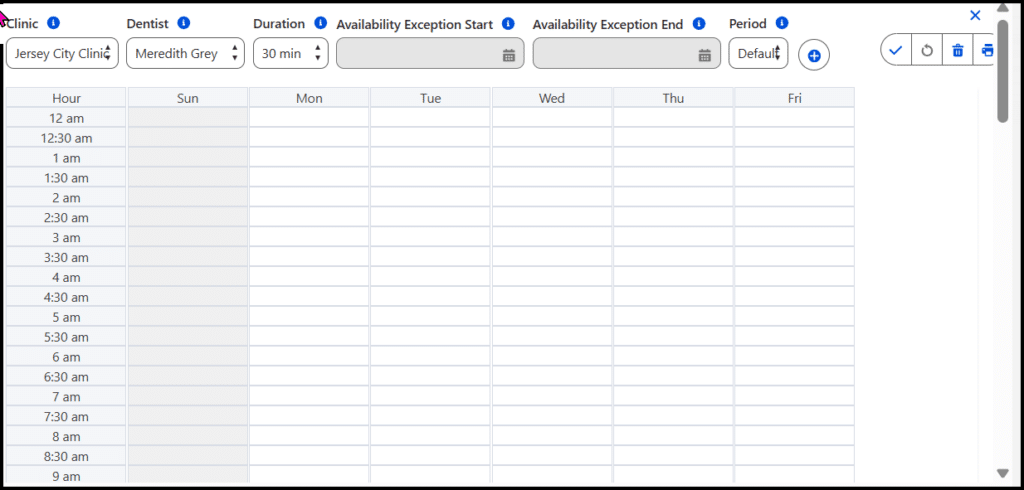
- Select Set Availability Template. The availability settings page appears.
- Select your name (or the name of the user whose availability is being set) from the User field if it is not already selected.
- Click the + sign next to the Period field to add an exception period.
- Click the calendar icon on Availability Exception Start.
- From the popup, select the first date on which the exceptions will apply.
- Click the calendar icon on Availability Exception End.
- From the popup, select the last date on which the exceptions will apply.
- Ensure that the timeslots are clear for your unavailable days and times within the exception period.
- Click Apply. (the checkmark icon).
- Close the template. The Availability calendar appears.
To subsequently view your exceptions, be sure to select the exception period from the Period dropdown.

Scheduling an Appointment Using an Availability Calendar
Availability calendars vary. This is one example. For greater detail and more examples, refer to Scheduling/Booking Available Resources.
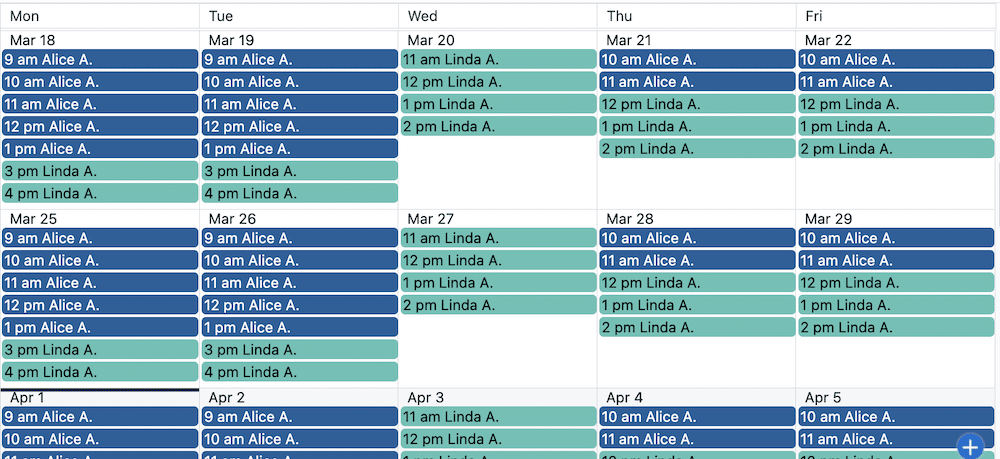
- On the CalendarAnything LWC menu, click the name of the Availability Calendar to be opened. The Availability calendar appears.
- Right-click the timeslot for the resource, date, and timeslot to be booked. A context menu appears.

- On the context menu, click Create Appointment. The create and edit popup appears.
Note: The appearance of the popup depends upon configuration. - Enter the appointment information.
- Click Save. The application removes the time slot from the calendar and creates the appointment.
Refer to Scheduling/Booking Available Resources for more instructions and examples of using Availability calendars.