Calendar Organization | Classic
In this article you will learn about:
- Group Calendars
- Public Holiday Calendars
- Calendar folders
- Hide/display or re-arrange calendars in the sidebar
Group Calendars
Create calendar groups for a quick overlay of multiple grouped calendars and a more organized left side panel. Grouped calendars can either retain their individual colors or display a new, uniform group color when the group is selected in the calendar view.
You can create a group from any existing CalendarAnything calendar. To create a new group, from the calendar view click the My Calendars button on the left panel and select the Calendar Controls option. This opens the Calendars Controls page.
On the bottom left, click the drop down and select Calendar Groups. Click Add Calendar Group to open the Create Group page.
Creating a new group involves three simple steps:
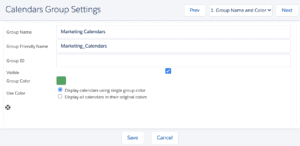
Step 1: Enter a name for the new calendar group. You may choose to display all calendars using a single group color of your choice, or display calendars in their original colors.
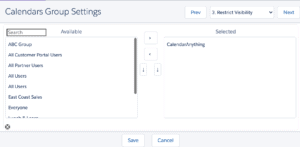
Step 2: Select the calendars for the group. This page shows all available calendars based on your user permissions.

Step 3: Restrict visibility. As with standard CalendarAnything calendars, you may specify which Salesforce public groups have access to this calendar group.
Once you have entered the settings for your calendar group, click Save and return to the Calendar Controls page. Click the Go to Calendars button to return to the calendar view.
Public Holiday Calendars
Did you know that you can add a holiday calendar to CalendarAnything? CalendarAnything will use Google Calendar’s public holiday calendar to mark banking, religious, and state holidays.. If you’ve already installed CalendarAnything and you’d like to add this feature, simply create a new web calendar:
1. Navigate to CalendarAnything.
2. In the left-hand side navigation, under Web Calendars, click create a new one.
3. Name your calendar.
4. Use the following URL for the web calendar:
https://www.google.com/calendar/feeds/[email protected]/public/basic
5. Share with any relevant public groups.
Calendar folders
Organize calendars into folders to keep track of your calendars more easily.To add a new folder, navigate to My Calendars > Display Settings. Select the Calendars tab.
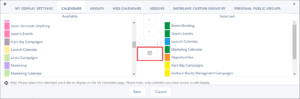
Click on the Folder icon, enter a folder name, and click OK.

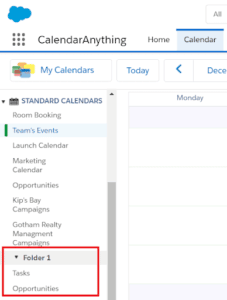
In this example above, new folder “Folder 1” was created.

All calendars below Folder 1 are now added to Folder 1.
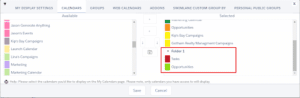
The user can decide which calendars should be added to Folder 1 by dragging the folder
down the list of calendars. In the example below, Folder 1 now contains only two
calendars, Tasks and Opportunities:
To remove the calendar folder, navigate to My Calendars > Display Settings. Select the Calendars tab and simply drag the folder name to the Available column. In order to change the folder name, remove the old folder from the Selected list and create a new folder.
Hide/display or re-arrange calendars in the sidebar
Add or remove calendars to the left sidebar display in CalendarAnything, whether a calendar is a standard, group, or web calendar.

Go to My Calendars > Display Settings. This opens the display settings where you can select the relevant sidebar tab option.
Calendars refers to standard calendars, Groups refers to calendar groups, and Web Calendars refers to external web calendars.
After selecting the appropriate tab, drag calendars to hide/display or re-arrange the calendars in the sidebar.