Calendar Organization | LWC
If your business has requirements that go beyond our out-of-the-box features, reach out - we offer custom development services for CalendarAnything to meet your unique needs.
In this article:
Related videos
Calendar Lists | Creating Grouped Calendars | How to Configure Holidays Web Calendar |
|---|---|---|
|
|
|
Creating grouped calendars
In CalendarAnything, you can create a grouped calendar from two or more existing calendars. A grouped calendar can come in handy when you need to see information from multiple calendars at a glance.
Assume, for example, that you are a project manager. You want to schedule project meetings when most team members are available. Your events calendar shows scheduled events for team members but does not show PTO, which is logged in a separate calendar. By grouping the calendars, you can see at a glance the dates and times for which most team members are available.
The steps below show an example of how to create a grouped calendar using an Events calendar and an Opportunities calendar. Follow the steps to learn how a group calendar is created.
- Click the CalendarAnything gear icon to open Settings.
- On the Settings panel, click Create and Edit > Grouped Calendars.
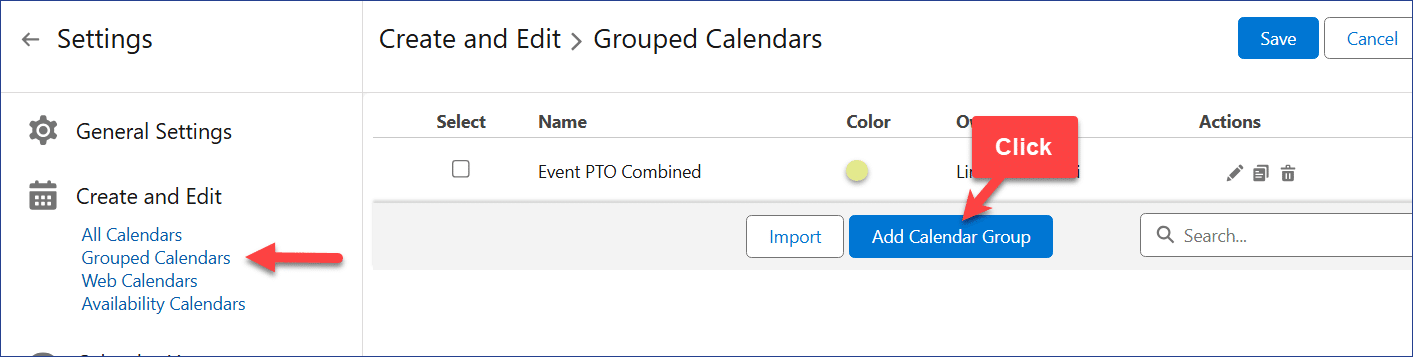
- On the Grouped Calendars page, click Add Calendar Group. The Create and Edit wizard for grouped calendars appears.
- Select a Display Color option. Group enables you to select one color to represent the grouped calendar. Respect Original allows all calendars in the group to retain their original colors.
- Select a Color for the grouped calendar. This will be the default color for the entire group if the Group option is selected for Display Color.
- Enter a Name for the calendar group.
- Select the Display on Sidebar checkbox if you want the grouped calendar to be visible.

- Select Calendar Grouping on the step menu or click Next. The Calendar Grouping step details appear.
- Use the Search Calendars field to limit the calendars shown in the Available panel or scroll the Available panel directly.
- To add a calendar to the group, move it from the Available panel to the Selected panel either by double-clicking the calendar name or single-clicking the calendar name and clicking the right arrow.

- Select Sharing on the step menu; or click Next. The Sharing step details appear for you to share the calendar with specific Public Groups.
- For each public group with which you want to share the grouped calendar, double-click the group name on the Available panel or single-click it and click the right arrow. The group name appears in the Selected panel.
- To change the owner of the new calendar, select an owner from the Change Owner field list and click Set New Owner to confirm.
- Click Save.

Creating Web calendars
CalendarAnything’s Web Calendar feature enables you to create a calendar that displays information from a public Google or Outlook calendar.
When using a Google calendar
To implement this feature using a Google calendar, follow these steps:
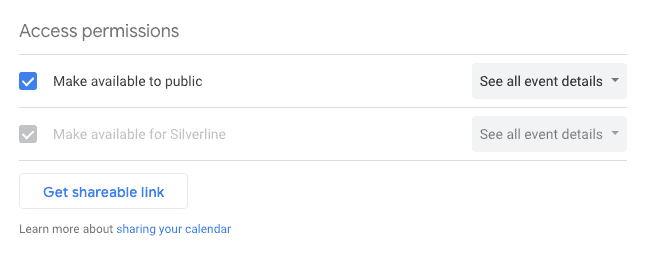
- Make the Google calendar public:
- Access Google calendar by entering google.com/calendar in your browser.
- Click the ellipses next to the appropriate calendar on the left panel.

- Select Settings and Sharing.
- On the Calendar Settings page, select the Make available to public checkbox.
- Retrieve the public ICAL URL.
- Scroll to the Integrate Calendar section. Copy the address under Public address in iCal format and paste it to a text file for later use.

- Scroll to the Integrate Calendar section. Copy the address under Public address in iCal format and paste it to a text file for later use.
- Add https://calendar.google.com to Remote Sites in your Salesforce organization as follows:
- Log in to Salesforce.
- Navigate to Setup → Remote Site Settings.
- Click New Remote Site. A blank Remote Site Edit page appears.
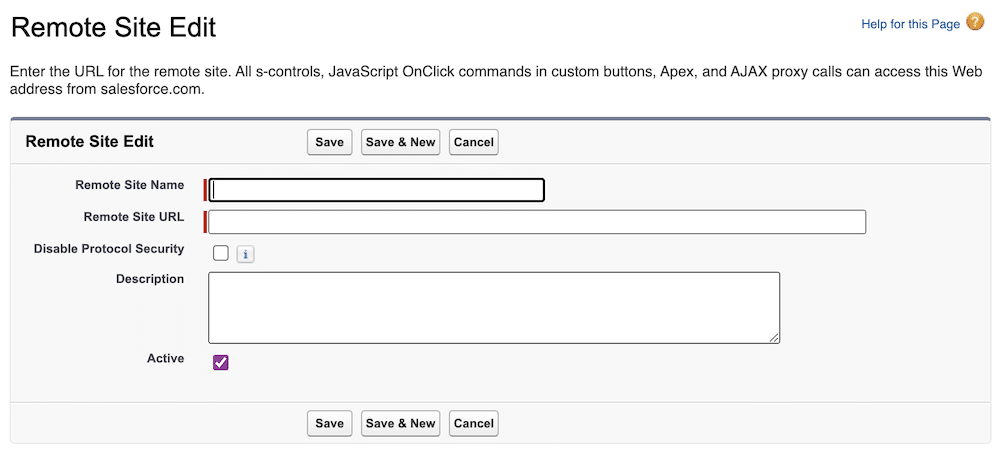
- Set Remote Site Name to google_calendar.
- Set Remote Site URL to https://calendar.google.com
- Set Active to TRUE.
- Click Save & New. A blank Remote Site Edit page appears.
- Next, add another remote site as follows:
- Set Remote Site Name to Google_Web_Calendar.
- Set Remote Site URL to https://content.googleapis.com.
- Set Active to TRUE.
- Click Save.
- Create a CalendarAnything LWC Web Calendar to represent the public Google calendar:
- Click the CalendarAnything gear icon to open Settings.
- Click Create and Edit > Web Calendars.
- On the Web Calendars page, click Add Calendar. The Create and Edit wizard for Web Calendars appears.
- On the Name and Color step:
- Enter a name for the Web Calendar that will be added to CalendarAnything LWC.
- Select a color for the calendar.
- Paste the public ICAL address in the URL field. (This is the address you copied in step 2.)
- Make sure the Display on Sidebar checkbox is checked if you want the web calendar to appear on the sidebar.
- On the step menu, select Sharing or click Next.
- On the Sharing step, select one or more Salesforce Public Groups from the Available panel. For each public group to be given access to the web calendar, double-click the calendar name on the Available panel or single-click it and click the right arrow. The calendar name appears in the Selected panel.
- Click Save. The web calendar will display in the left-side panel and may now be overlaid with other CalendarAnything LWC calendars.
When using an Outlook calendar
To implement this feature using an Outlook calendar, follow these steps:
- Access Outlook.
- Click the calendar icon. The calendar page appears.
- Click the Settings icon. The Settings page appears.
- Click Calendar.
- Click Shared Calendars.
- Under Publish a Calendar section, copy the ICS link and save it to a text file.
- Set up two new Remote Sites in your Salesforce organization as follows:
- Log in to Salesforce.
- Navigate to Setup → Remote Site Settings.
- Click New Remote Site.
- Set Remote Site Name to Outlook.
- Set Remote Site URL to https://outlook.office365.com
- Set Active to TRUE.
- Click Save.
- Click New Remote Site.
- Set Remote Site Name to OutlookLive.
- Set Remote Site URL to https://outlook.live.com
- Set Active to TRUE.
- Click Save.
- Create a CalendarAnything LWC Web Calendar to represent the public Outlook calendar:
- Click the CalendarAnything gear icon to open Settings.
- Click Create and Edit > Web Calendars.
- On the Web Calendars page, click Add Calendar. The Create and Edit wizard for Web Calendars appears.
- On the Name and Color step:
- Enter a name for the Web Calendar that will be added to CalendarAnything LWC.
- Select a color for the calendar.
- Paste the copied ICS link into the URL field. (This is the ICS link to the public Outlook calendar that you copied to a text file.)
- Make sure the Display on Sidebar checkbox is checked if you want the web calendar to appear on the sidebar.
- On the step menu, select Sharing or click Next.
- On the Sharing step, select one or more Salesforce Public Groups from the Available panel. For each public group to be given access to the web calendar, double-click the calendar name on the Available panel or single-click it and click the right arrow. The calendar name appears in the Selected panel.
- Click Save. The web calendar will display in the left-side panel and may now be overlaid with other CalendarAnything LWC calendars.
Maintaining calendar lists and folders
Calendar lists that appear on the CalendarAnything LWC side menu can be maintained in Settings using the Calendar Lists page.
Accessing calendar lists page
- Click the CalendarAnything LWC gear icon to open the Settings page.
- Select Calendar List.
- Select the specific calendar list that you want to maintain.
- All Calendars: list of CalendarAnything LWC calendars that do not belong to any of the other types of lists—Grouped Calendars, Web Calendars, or Availability Calendars.
- Grouped Calendars: list of grouped calendars.
- Web Calendars: list of external calendars.
- Availability Calendars: list of calendars used by the Availability Calendars feature.
The Calendar Lists page displays the selected list.
Adding and removing calendars
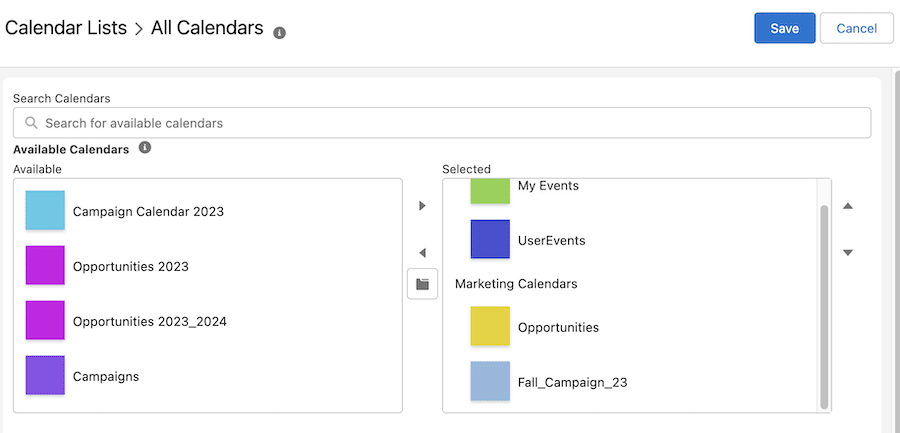
- On the Calendar Lists page, use the Search Calendars field to limit the calendars shown in the Available panel, or scroll the Available panel directly.
- For each calendar to be added to the list, double-click the calendar name on the Available panel or single-click it and click the right arrow. The calendar name appears in the Selected panel.
- For each calendar to be removed from the list, double-click the name on the Selected panel or single-click it and click the left arrow. The calendar name appears in the Available panel.
- To change the order of a calendar’s appearance on the list, use the up and down arrows as needed.
- Click Save.

Adding a folder
- On the Calendar Lists page, click the folder icon between the Available panel and the Selected panel.
- On the popup, enter a folder name. The folder name appears at the top of the Selected panel.
- For calendars that should not be within the folder, use the up-arrow key to move the calendars above the folder.
- Click Save.
Removing a folder
- On the Calendar Lists page, double-click the folder name on the Selected panel or single-click it and click the left arrow. The folder name appears in the Available panel, but the calendars that had been within that folder remain on the Selected panel.
- Click Save.