CalendarAnything Features | LWC
If your business has requirements that go beyond our out-of-the-box features, reach out - we offer custom development services for CalendarAnything to meet your unique needs.
CalendarAnything LWC (CA LWC) contains optional features that you can implement for added functionality. These features may be as simple as the option to print calendars or as powerful as the option to embed Salesforce Flows that update Salesforce records.
This article introduces you to CA LWC features. For articles on feature implementation and use, refer to the Learn How links provided.
In this article:
- Availability Scheduling
- Conditional Coloring
- Color Legend Filter
- Executing APEX Flows
- Filter Panels/Filter Sets
- Filter Folders (Video)
- Grouping
- Printing
- Global Search
- Add Ons
- Time zones
- Offline Mode
- Settings Visibility Override (System Admin feature)
To learn how to implement and use a feature, check for a list of Learn How links listed at the end of the feature introduction.
Availability Scheduling
The CA LWC Availability Scheduling feature enables Salesforce appointment scheduling based on user-maintained availability. The feature supports availability of users combined with the availability of other resources such as equipment, contacts, and locations.

Assume, for example, that some of your team members rotate among office locations. Availability calendars can show who is available, at what times, and where. Availability calendar users update their availability on an ad-hoc basis. If a user suddenly realizes they need to be out of the office on a given day, they can update their availability so that they no longer appear as available on that day.
Availability Scheduling minimizes guess work and hence time spent on back-and-forth meeting invitations.
Related Demo
![]()
Learn How
- CA LWC Availability Scheduling Admin Quick Start Guide
- CA LWC Availability Scheduling Admin Guide
- CA LWC Availability Scheduling Intersection
- CalendarAnything LWC Availability Calendars User Guide
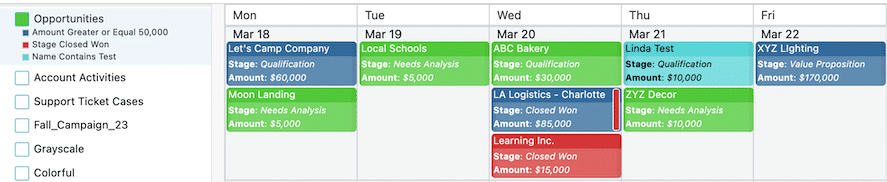
Conditional Coloring
Each calendar in CA LWC is configured with a default color. Events or records on the calendar appear in this color by default.
Calendar with no Conditional Coloring

You can make specific records stand out based on lookup field value by using the Conditional Coloring step of calendar setup. For example, we could configure Conditional Coloring as follows:
- Blue: Records for In Progress campaigns
- Gold: Records for Planned campaigns
Calendar with Conditional Coloring

Dynamic Conditional Coloring
In the example above, many records appear in the default calendar color. These are records that have a status for which no Conditional Color has been configured. For Conditional Coloring of lookup fields that frequently get new values, you may want to let the application handle it for you with Dynamic Conditional Coloring. Dynamic Conditional Coloring automatically applies a permanent color code to a lookup field value if no color is assigned and the field has Conditional Coloring applied.
Multilevel Conditional Coloring
Standard Conditional Coloring only allows one color per record. Multilevel Conditional Coloring enables you to add up to three additional colors per record. The additional colors appear on the right side of the event.
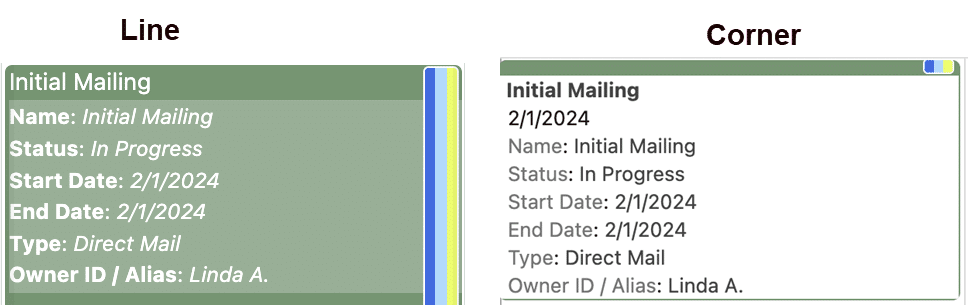
The Multilevel Color Display setting must be set to Line or Corner to enable Conditional Coloring. If the setting is set to Line, colors appear as vertical lines running the full-length of the record. If the setting is set to Corner, colors appear in the upper-right corner of the record. This setting is located under CalendarAnything > General Settings > Advanced.
To learn how to implement and use a feature, check for a list of Learn How links listed at the end of the feature introduction.
Learn How
- Create, Edit, and Share Calendars
- Color Code Your Calendars
- Dynamic Conditional Coloring Advanced Settings
Color Legend Filter
The Color Legend Filter enables you to filter calendar records by directly interacting with your calendar’s color legend without the need to enable the filter panel.
Related Demo
![]()
Learn How
Executing APEX Flows
Salesforce Flows execute APEX logic against Salesforce data and are built with Salesforce Flow Builder. CA LWC provides options to execute Salesforce Flows directly from your calendar Details and Create and Edit popups. Options include:
- Configuring the Create and Edit popup to execute a Salesforce Flow
- Configuring the Details popup with a custom tab to execute a Salesforce Flow
- Configuring the Details popup with a custom button to execute a Salesforce Flow
Custom buttons can also be configured to navigate to external URLs, open a lightning component, and navigate to a related record.
Learn How
- Configuring a Calendar to Use a Salesforce Flow (Can only be performed by an admin)
- Adding Custom Tabs and Buttons to the Details Popup
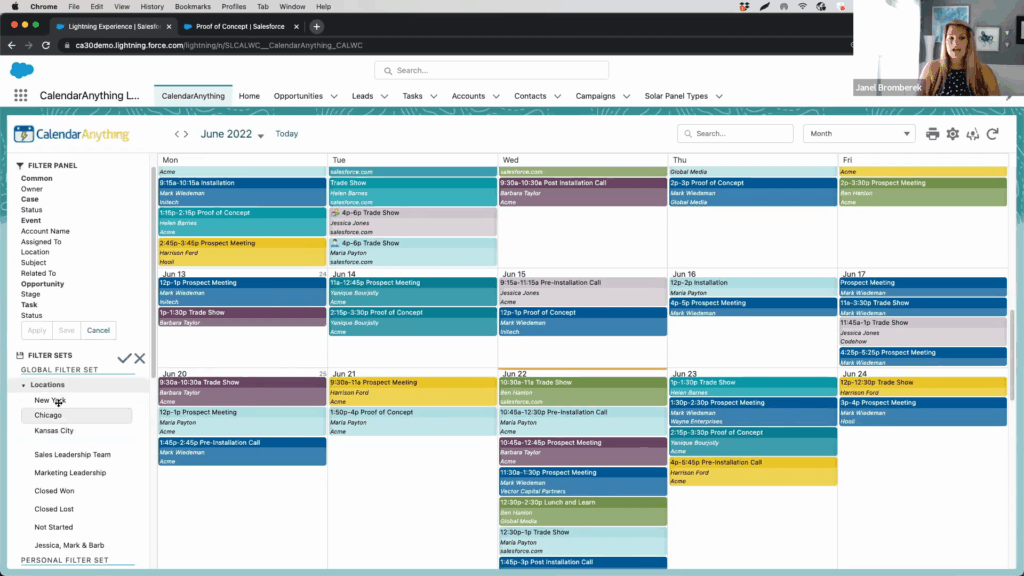
Filter Panels/Filter Sets
The Filter Panel and Filter Sets on the calendar sidebar enable users to specify criteria for determining which records to display for a calendar use session. Filter Panel fields are predefined by the system administrator. Filter Sets can be created by a system administrator as well as an end user.

Get step-by-step details in the article Filter Panels and Filter Sets in CalendarAnything LWC. Also, watch the video below.
Filter Folders (Video)
Learn How
Grouping
Field grouping is supported for these calendar views:
Learn How
Printing
CalendarAnything LWC enables you to print your calendar from any calendar view. Clicking Print, brings up the calendar in Print Mode.
![]()
While viewing a calendar in Print mode, you can click Settings to access a large variety of settings for customizing the printed output. Clicking Print while in Print mode, brings up the calendar in Print Preview.

Learn How
Global Search
Typing in the Search box automatically filters events on the calendar layout to show only those that contain entered search criteria. Global search gives you the ability to search by any field on the calendar entry/Salesforce record.
- To define what you can search by:
- Enter a value in Field Name Calendar Criteria step of the Create/Edit Calendar wizard.
- Select additional fields on the Display Additional Fields step.
Add Ons
CalendarAnything LWC supports the Add-On features:
- Chatter: Allows you to see the Chatter posts on the event record in the Event Details Popup. Users can also write Chatter posts from the tab itself.
- Attendees: Allows you to invite users, leads, and contacts to an event.
- Attachment: Displays a list of attachments with file extension and size. You can add and delete attachments from the tab as well.
- Online Meeting
- Slack
- Microsoft
- Notes
- Map
To expose these Add-Ons, go to General Settings > Display and Layout and select the checkbox for each Add-On you want to expose.

Each exposed Add-on will appear as a tab on the CA LWC Details popup.

Related Demo
![]()
Learn How
- To learn how to configure Chatter settings and enable Chatter, refer to Add Ons section in Getting Started with CalendarAnything LWC.
Time zones
A system administrator can set the preferred time zone and display settings for working with calendars. Users can opt to use the server time zone by setting the Use Server Timezone setting in General Settings.
If you make an entry in a certain time zone, it always remains in that particular time frame, even if you subsequently change the display time zone.
If you are using a time zone that observes DST changes, that will be displayed in Salesforce depending on the time zone in your user settings.
Learn How
Offline Mode
For Mobile users, CalendarAnything LWC allows you to view your Calendars and records that were loaded during your last session, even after you have lost your internet connection.
Note: This feature is available for Mobile only.
To enable the offline mode feature for your mobile application, follow these steps:
- Go to CalendarAnything General Settings.
- Select Advanced.
- Select On from the Load Offline Data field.
- Click Save.

Settings Visibility Override (System Admin feature)
When someone first uses CalendarAnything, the application applies global default settings and copies those settings to the individual’s profile. Users can customize their calendars by configuring the General Settings available to them.
The Settings Visibility Setup page enables system admins to manage and override General Settings with the following options.
- Settings Visibility: This option provides a view of current settings and enables settings to be selected for use with subsequent page options.
- Global Default Settings: This option shows all General Settings and enables them to be updated. Updates made here will not override settings customized by the user. Note: System administrators can use the Settings Override feature to lock down Global Default settings.
- Profile: This option enables General Settings to be set at a profile level. Updates made here will override settings customized by users with the affected profile, and these users will no longer see those settings in their General Settings. Note: This prevents users from subsequently updating those settings.
- Roles: This option enables General Settings to be set at a role level. Updates made here will override settings customized by users with the affected role, and these users will no longer see those settings in their General Settings.
- Settings Override: This option enables General Setting overrides at the Organization-Wide (Global) default, profile, and role level.
Learn How